
For years, there’s been a presence on the horizon every time I’ve climbed in North Cascades National Park. Tumbling glaciers and rocky ridges shape its flanks while the sheer remoteness conjures an air of mystery. Native American populations revered this mountain and its spirit, honoring it with the name Dakobed, which translates to The Great Parent. Later, the peak got a “government name” of Glacier Peak. Larissa Ault and I climbed Frostbite Ridge on July 14, 2025 on a four day trip.
Larissa and I began our approach from the North Fork Sauk River trailhead on Saturday morning with meticulously packed backpacks. One of the primary challenges of climbing Glacier Peak is dealing with a massive approach where a light backpack is key. At least we would get a warmup: a six mile amble along the Sauk River allowed us to stretch our legs before a 3000 foot haul out of the valley. At the junction with the Pacific Crest Trail, most climbers turn right to approach the Gerdine Ridge/Cool Glacier route. Larissa and I turned left, seeking a more solitary and challenging experience.
Frostbite Ridge has a lot of appeal to the climber seeking compelling terrain rather than the easiest route to the summit. The route follows glaciers, steep snow, crumbling rock, and corniced ridgeline before a finale of alpine ice pitches. Technical difficulties are moderate but don’t be fooled: this route is certainly not a walkup and requires a well-rounded set of alpine skills. Well-developed foot calluses won’t hurt either – Frostbite Ridge requires 40+ miles of hiking. We planned to climb Frostbite and descend the Gerdine Ridge/Cool Glacier route, making a beautiful traverse of the mountain from North to South. The perfect way to experience a mountain for the first time!
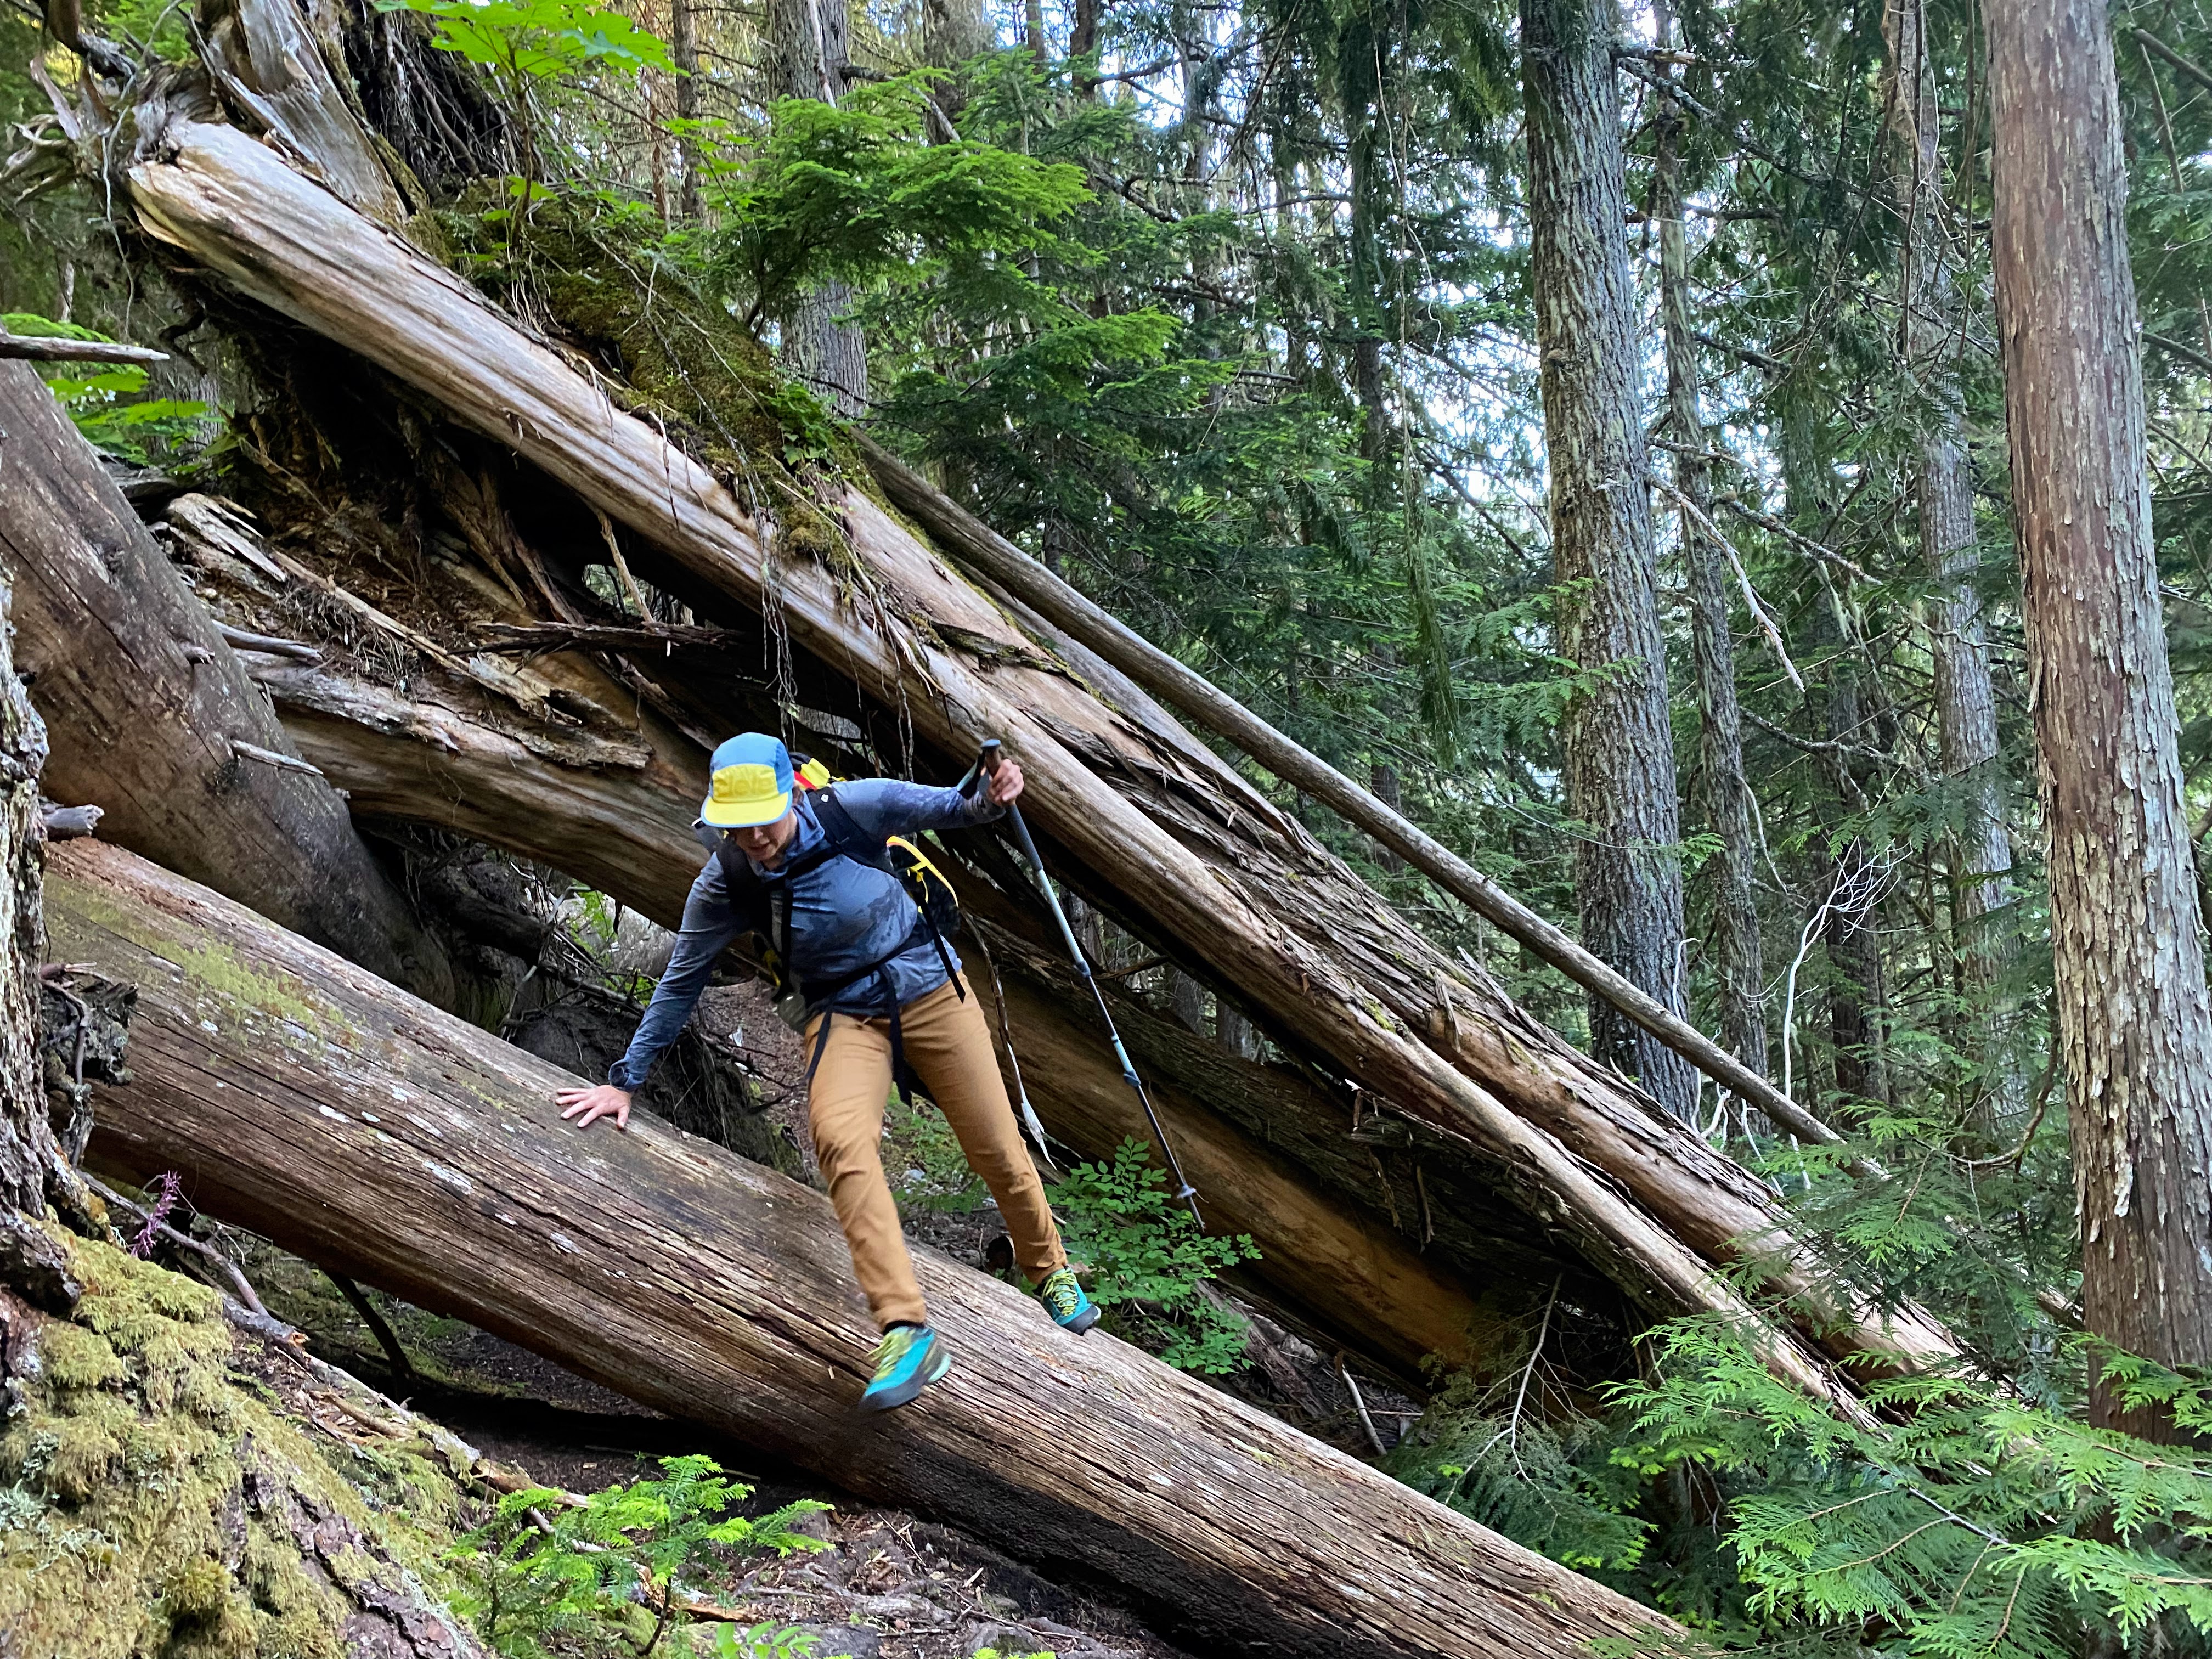

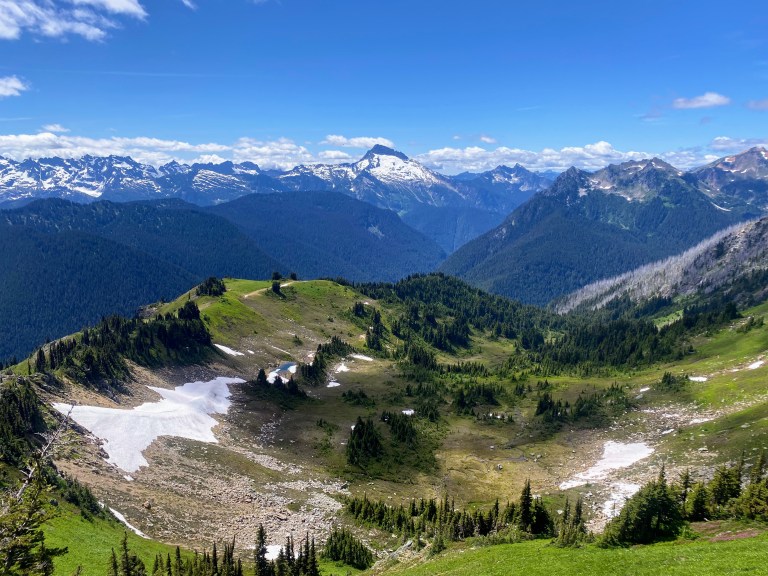
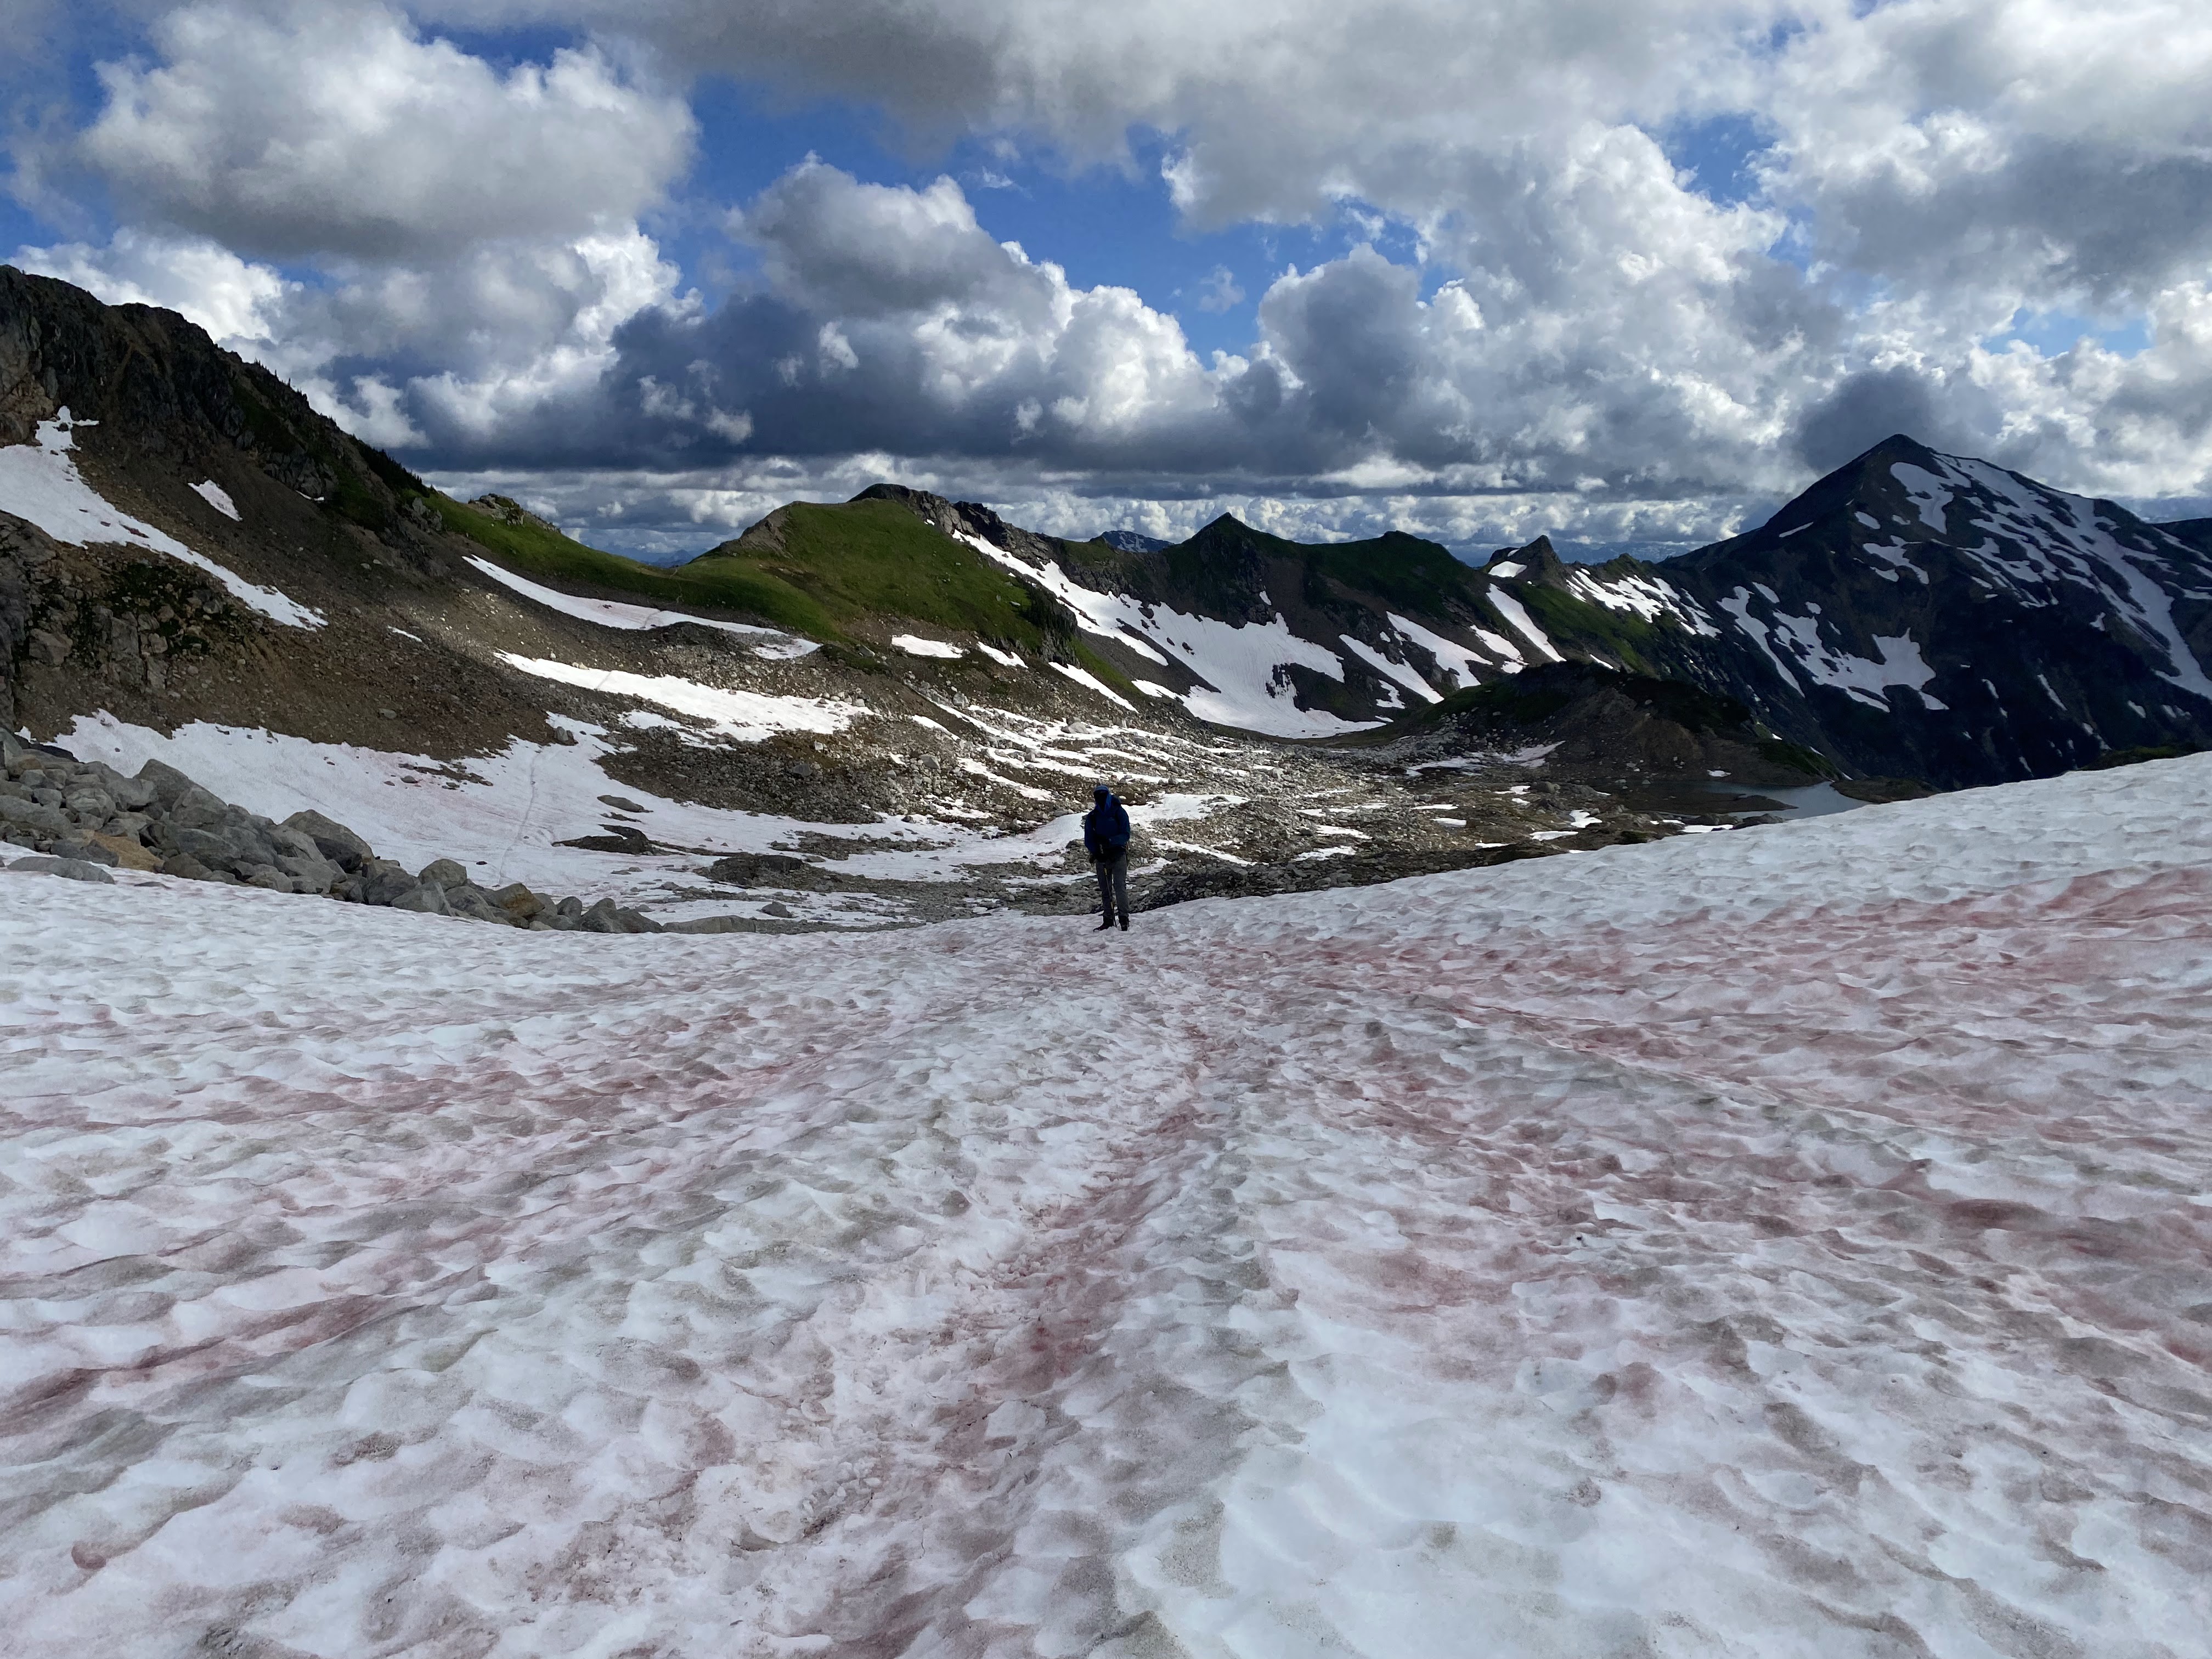
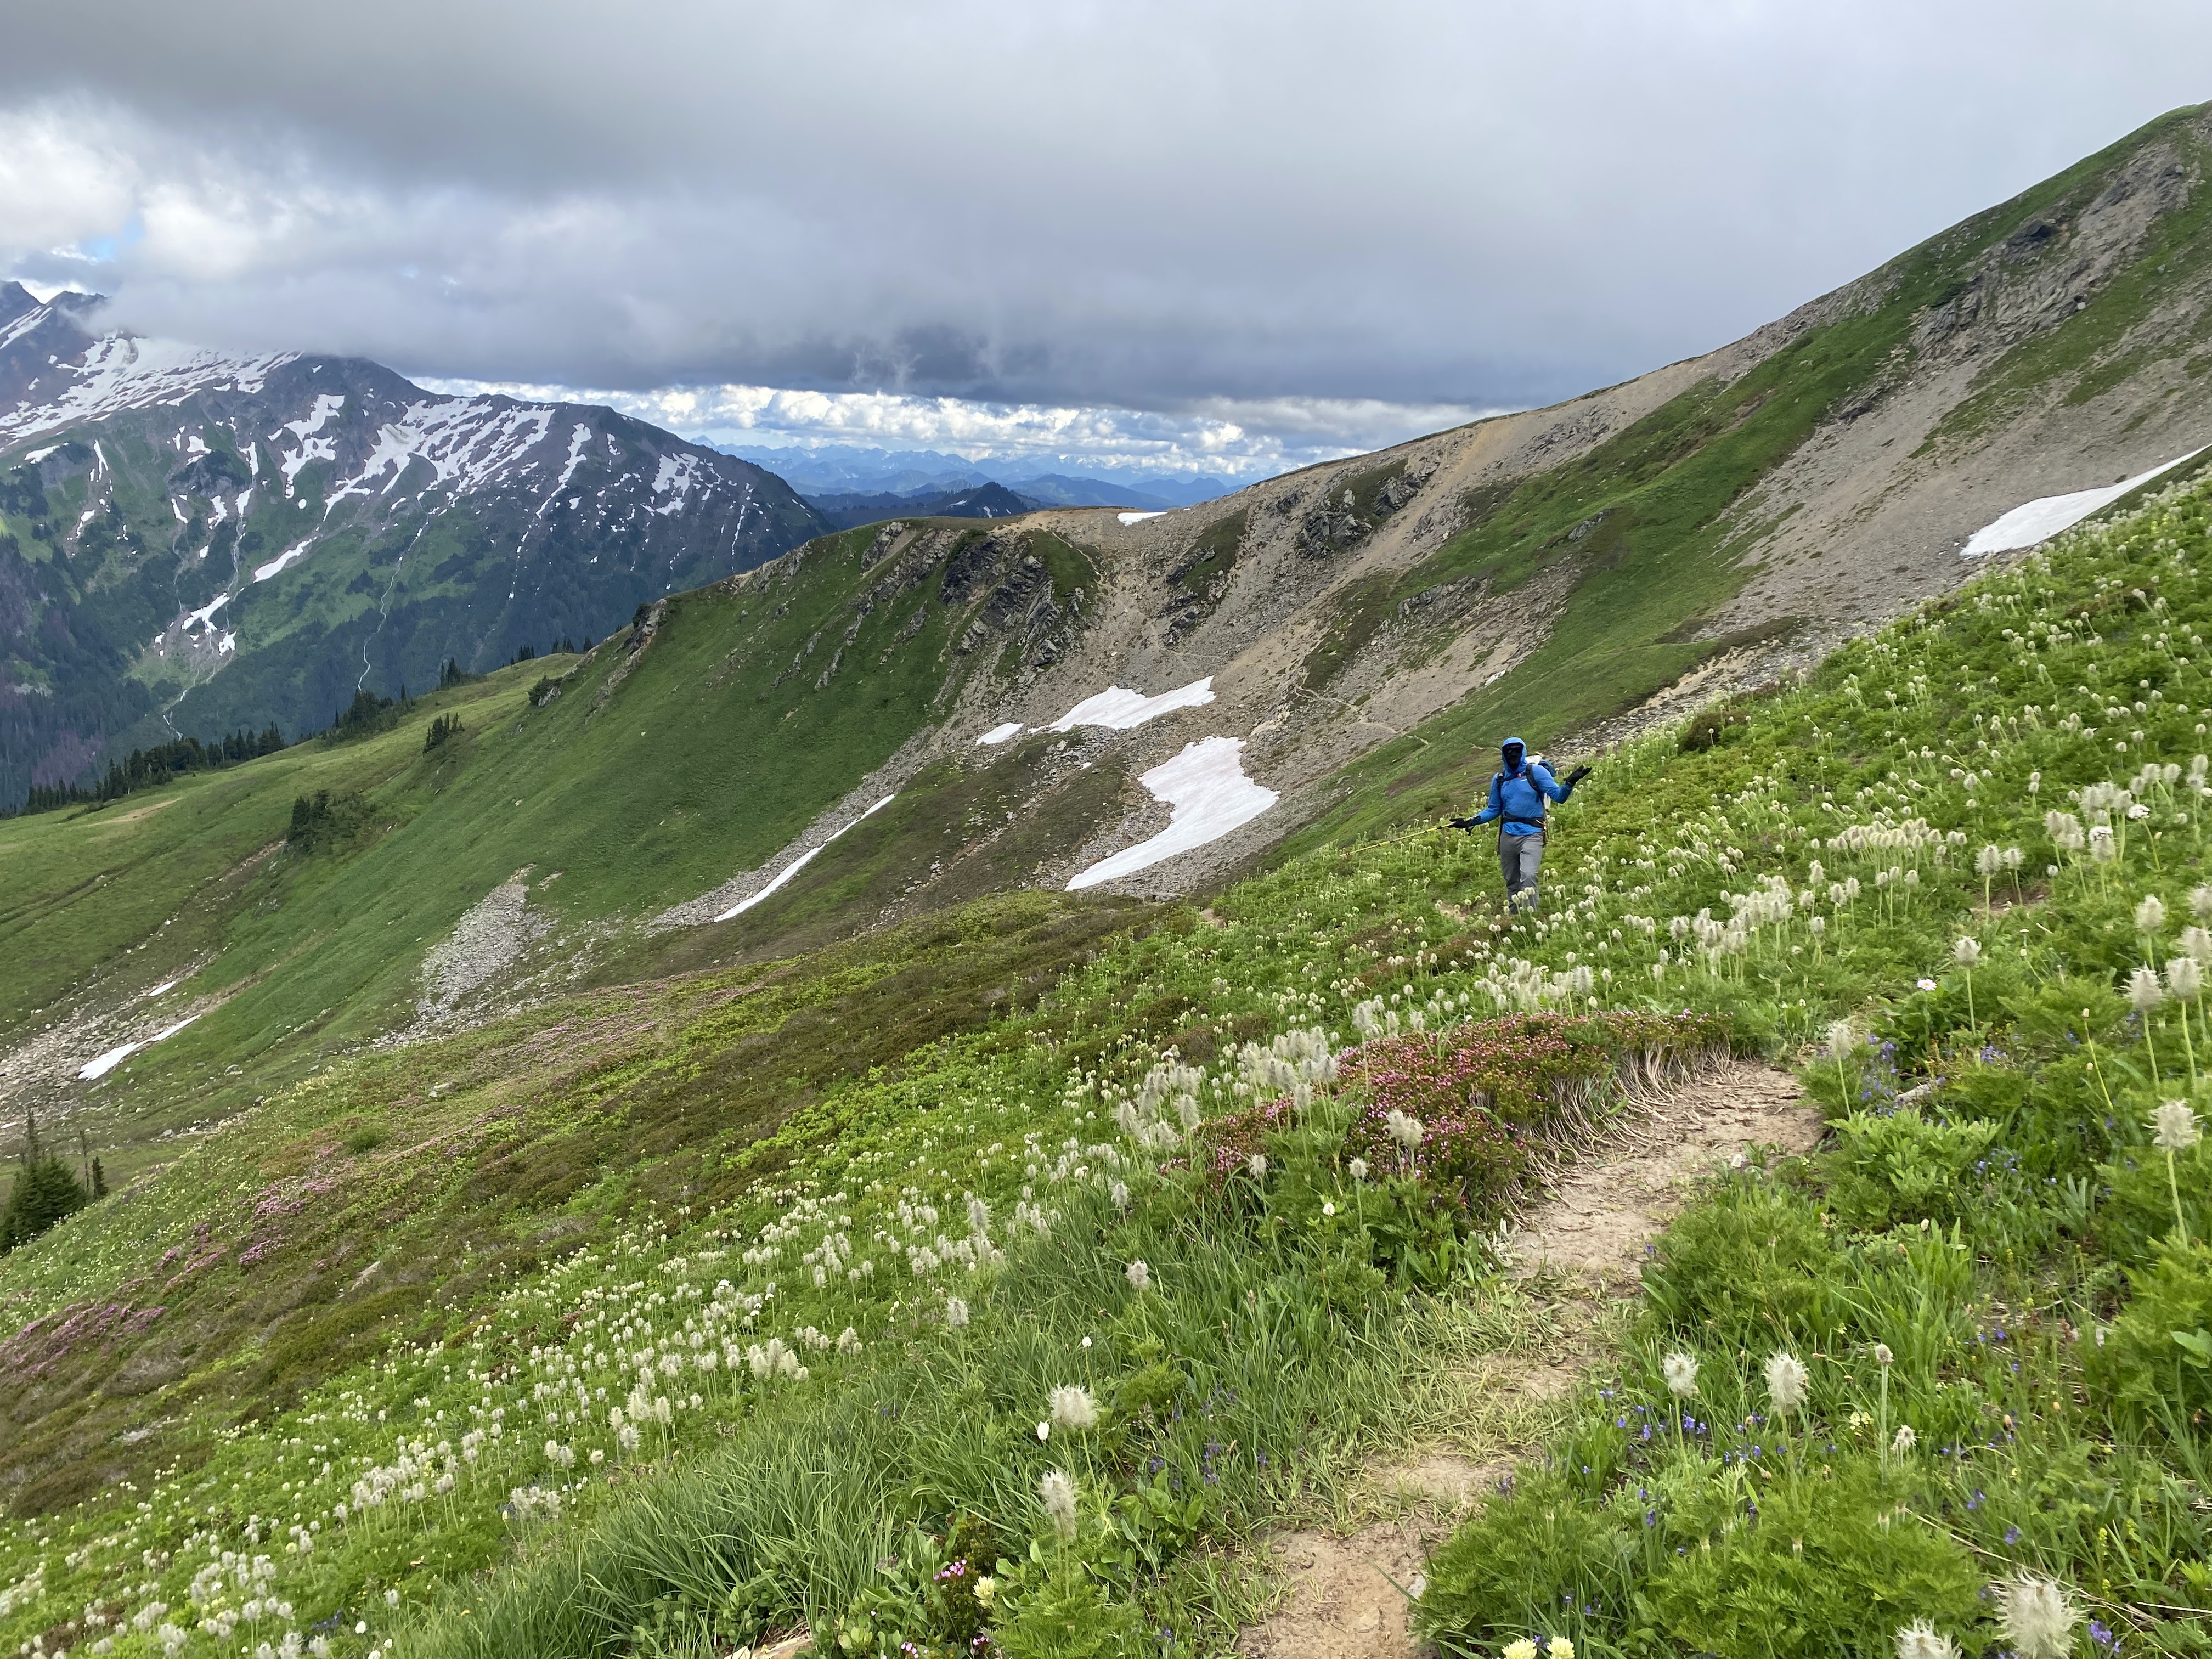
Further along the Pacific Crest Trail, travel was sometimes difficult due to fallen trees and overgrown trail, which was a surprise to me after hiking pristine sections of the PCT in the past. A few creek crossings along the way involved getting our feet wet, notably the crossing of Kennedy Creek. Thankfully, a couple of strategically placed logs allowed us to (mostly) stay out of the raging water. We finally reached Glacier Creek at about 10pm, relieved to find a nice campsite for the evening. We had done 24 miles on our first day! Our 14 hour day one necessitated some additional recovery time in the form of a late start on day two. At a leisurely 10:30 the next morning, we began traveling off-trail up Glacier Creek to a huge, open basin with amazing views of the Kennedy and Scimitar Glaciers.
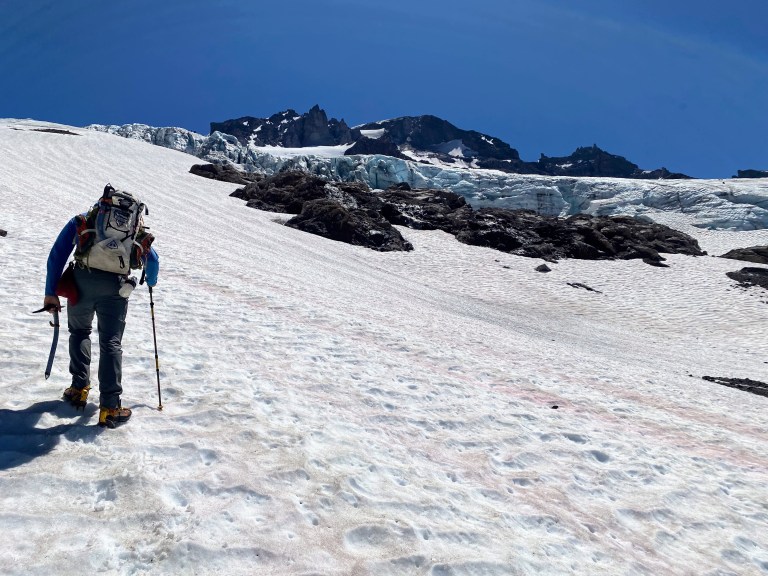
Higher in the basin, you have to choose your adventure. On the left, there is a mellow snow gully which promises quick travel but suffers from high objective hazard. The cliffs of Kennedy Peak regularly shed rock into the gully, as evidenced by the amount of rocks and craters in the snow. On the right, there is a terribly chossy rock rib which promises slow, frustrating travel and its own set of objective hazards. Larissa and I chose to quickly ascend the snow gully, taking turns watching the cliffs above for any bombs coming down. We didn’t see a single piece of rockfall – thank you, mountain gods.
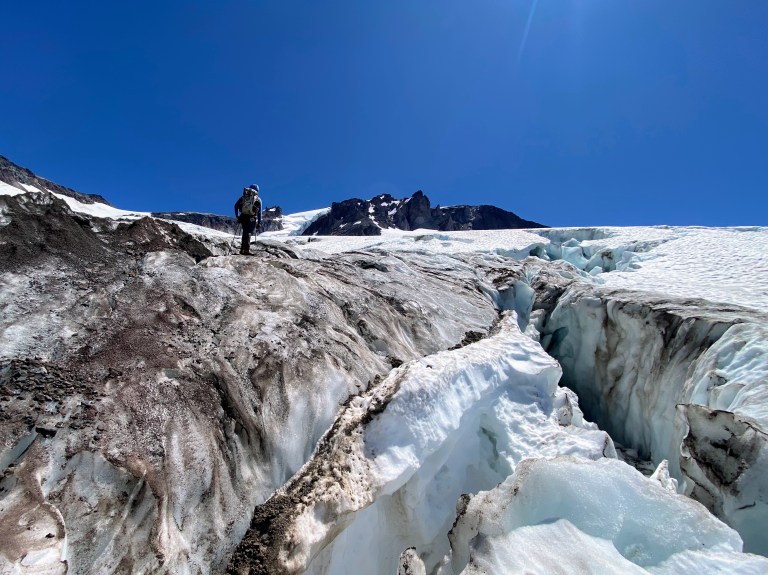

Somewhat relieved, we gained the toe of the Kennedy Glacier without incident and roped up. Mellow glacier travel took us to the confluence of the Kennedy Glacier and a branch of the Dusty Glacier. This is the ice equivalent of two big rivers running into each other – a bit choppy and a dicey proposition in late afternoon heat! As I wove between crevasses and probed for hidden ones, the glacier groaned and cracked underfoot. I enjoyed a massive adrenaline dump when I heard a collapse rumble directly below my feet – thankfully the surface remained intact and I tip toed away. Once established on the Vista glacier, things mellowed out and we cruised up to a glacial saddle at 8800 feet just below the steep and exposed climbing of the route. A pre-existing bivy site on the rock ridge seemed like the perfect spot to camp, but this proved to be a mistake. High winds battered us all night, preventing even a minute of sleep for either of us. A better choice would have been to camp on the flat, perfectly wind-protected snow on the lee side of the ridge. Live and learn.
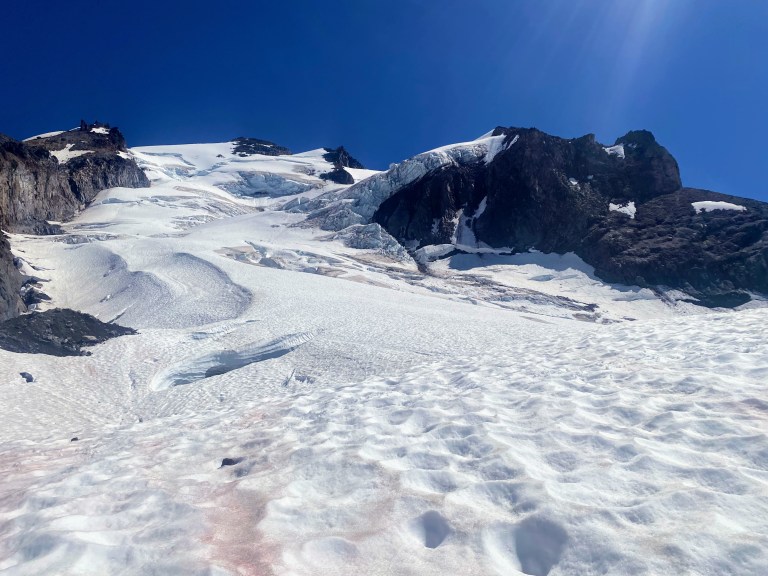
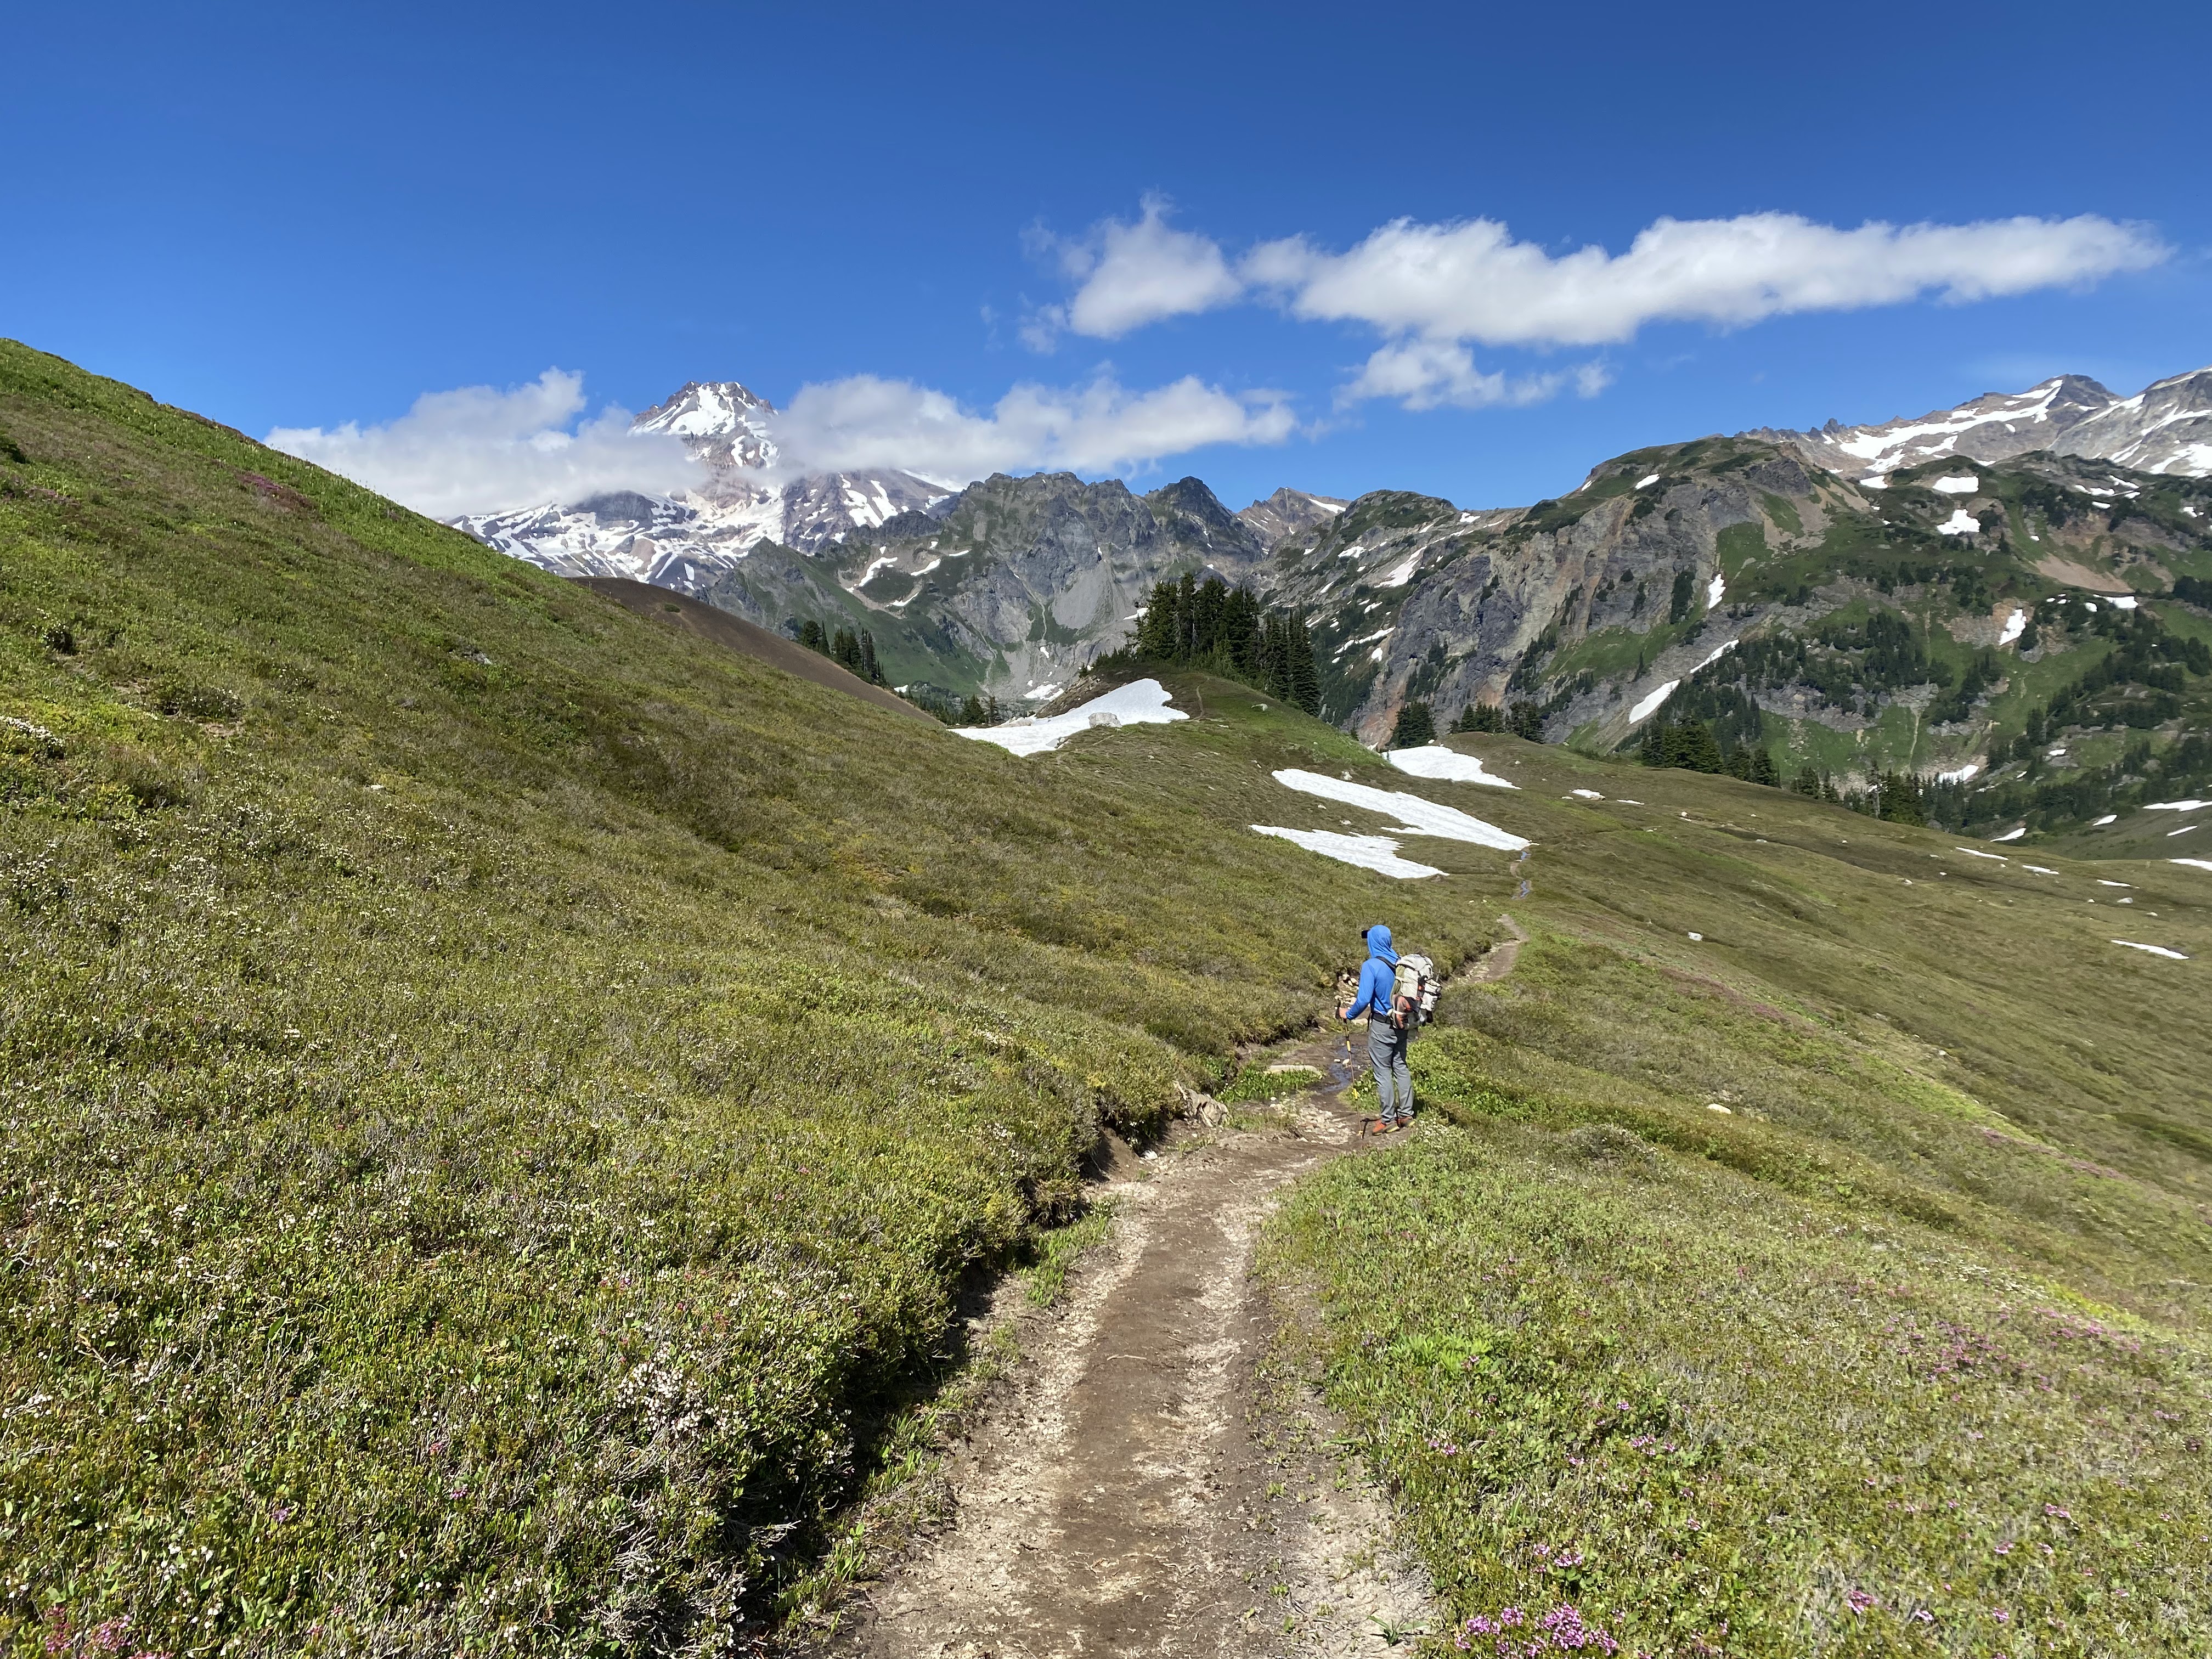
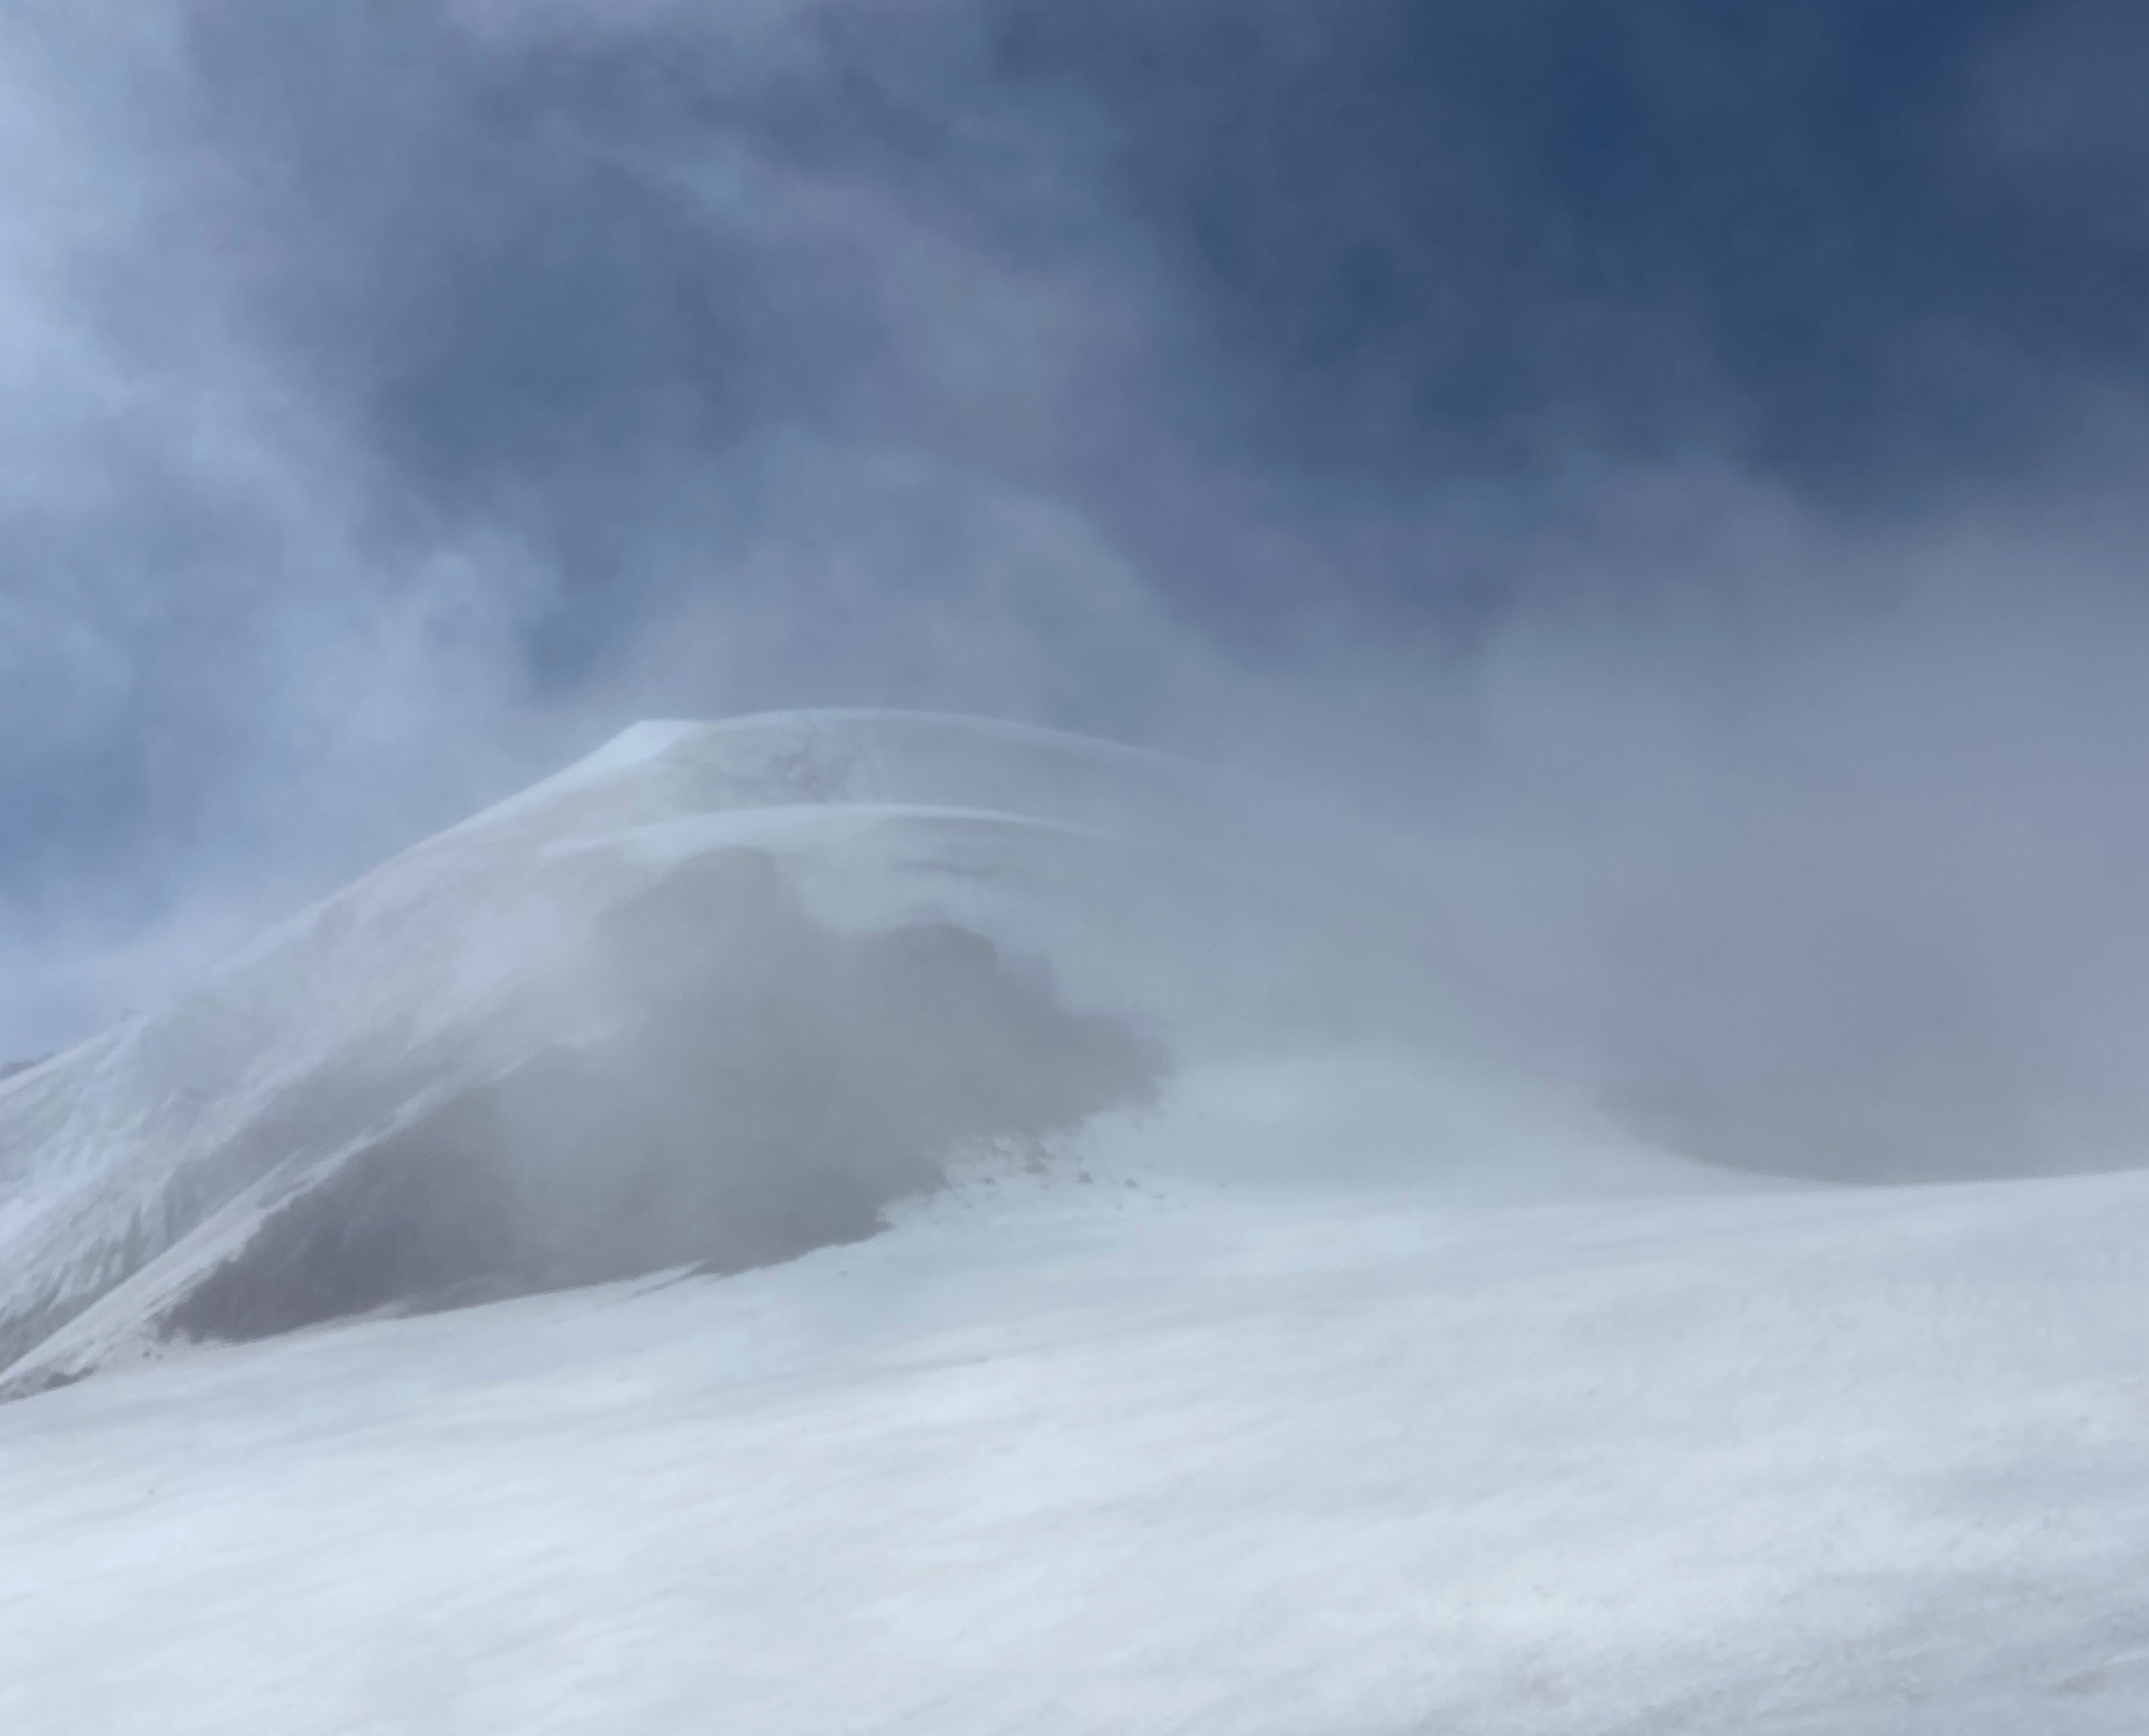
In the morning, we groggily looked outside to find that we were inside a cloud and the wind was still blasting. I pulled a weather forecast on my Inreach which indicated that the weather would remain the same all day, but I chose to focus on the 0% chance of precipitation. What to do? Charge upward into unsettled weather, or bail back down the Kennedy Glacier to make the long hike back home? After some debate, the clouds lifted to reveal an undercast cloud layer. Clear air and sun beckoned to us from above. The wind persisted, but so would we. Upward we go!

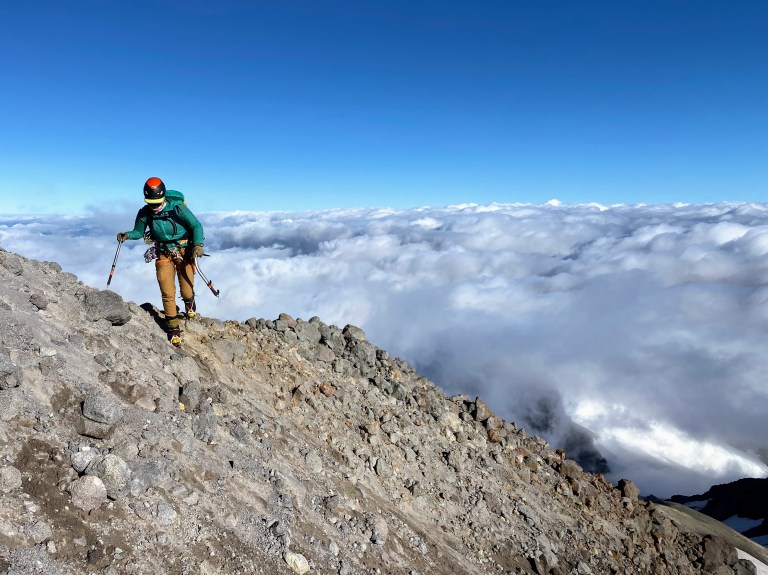
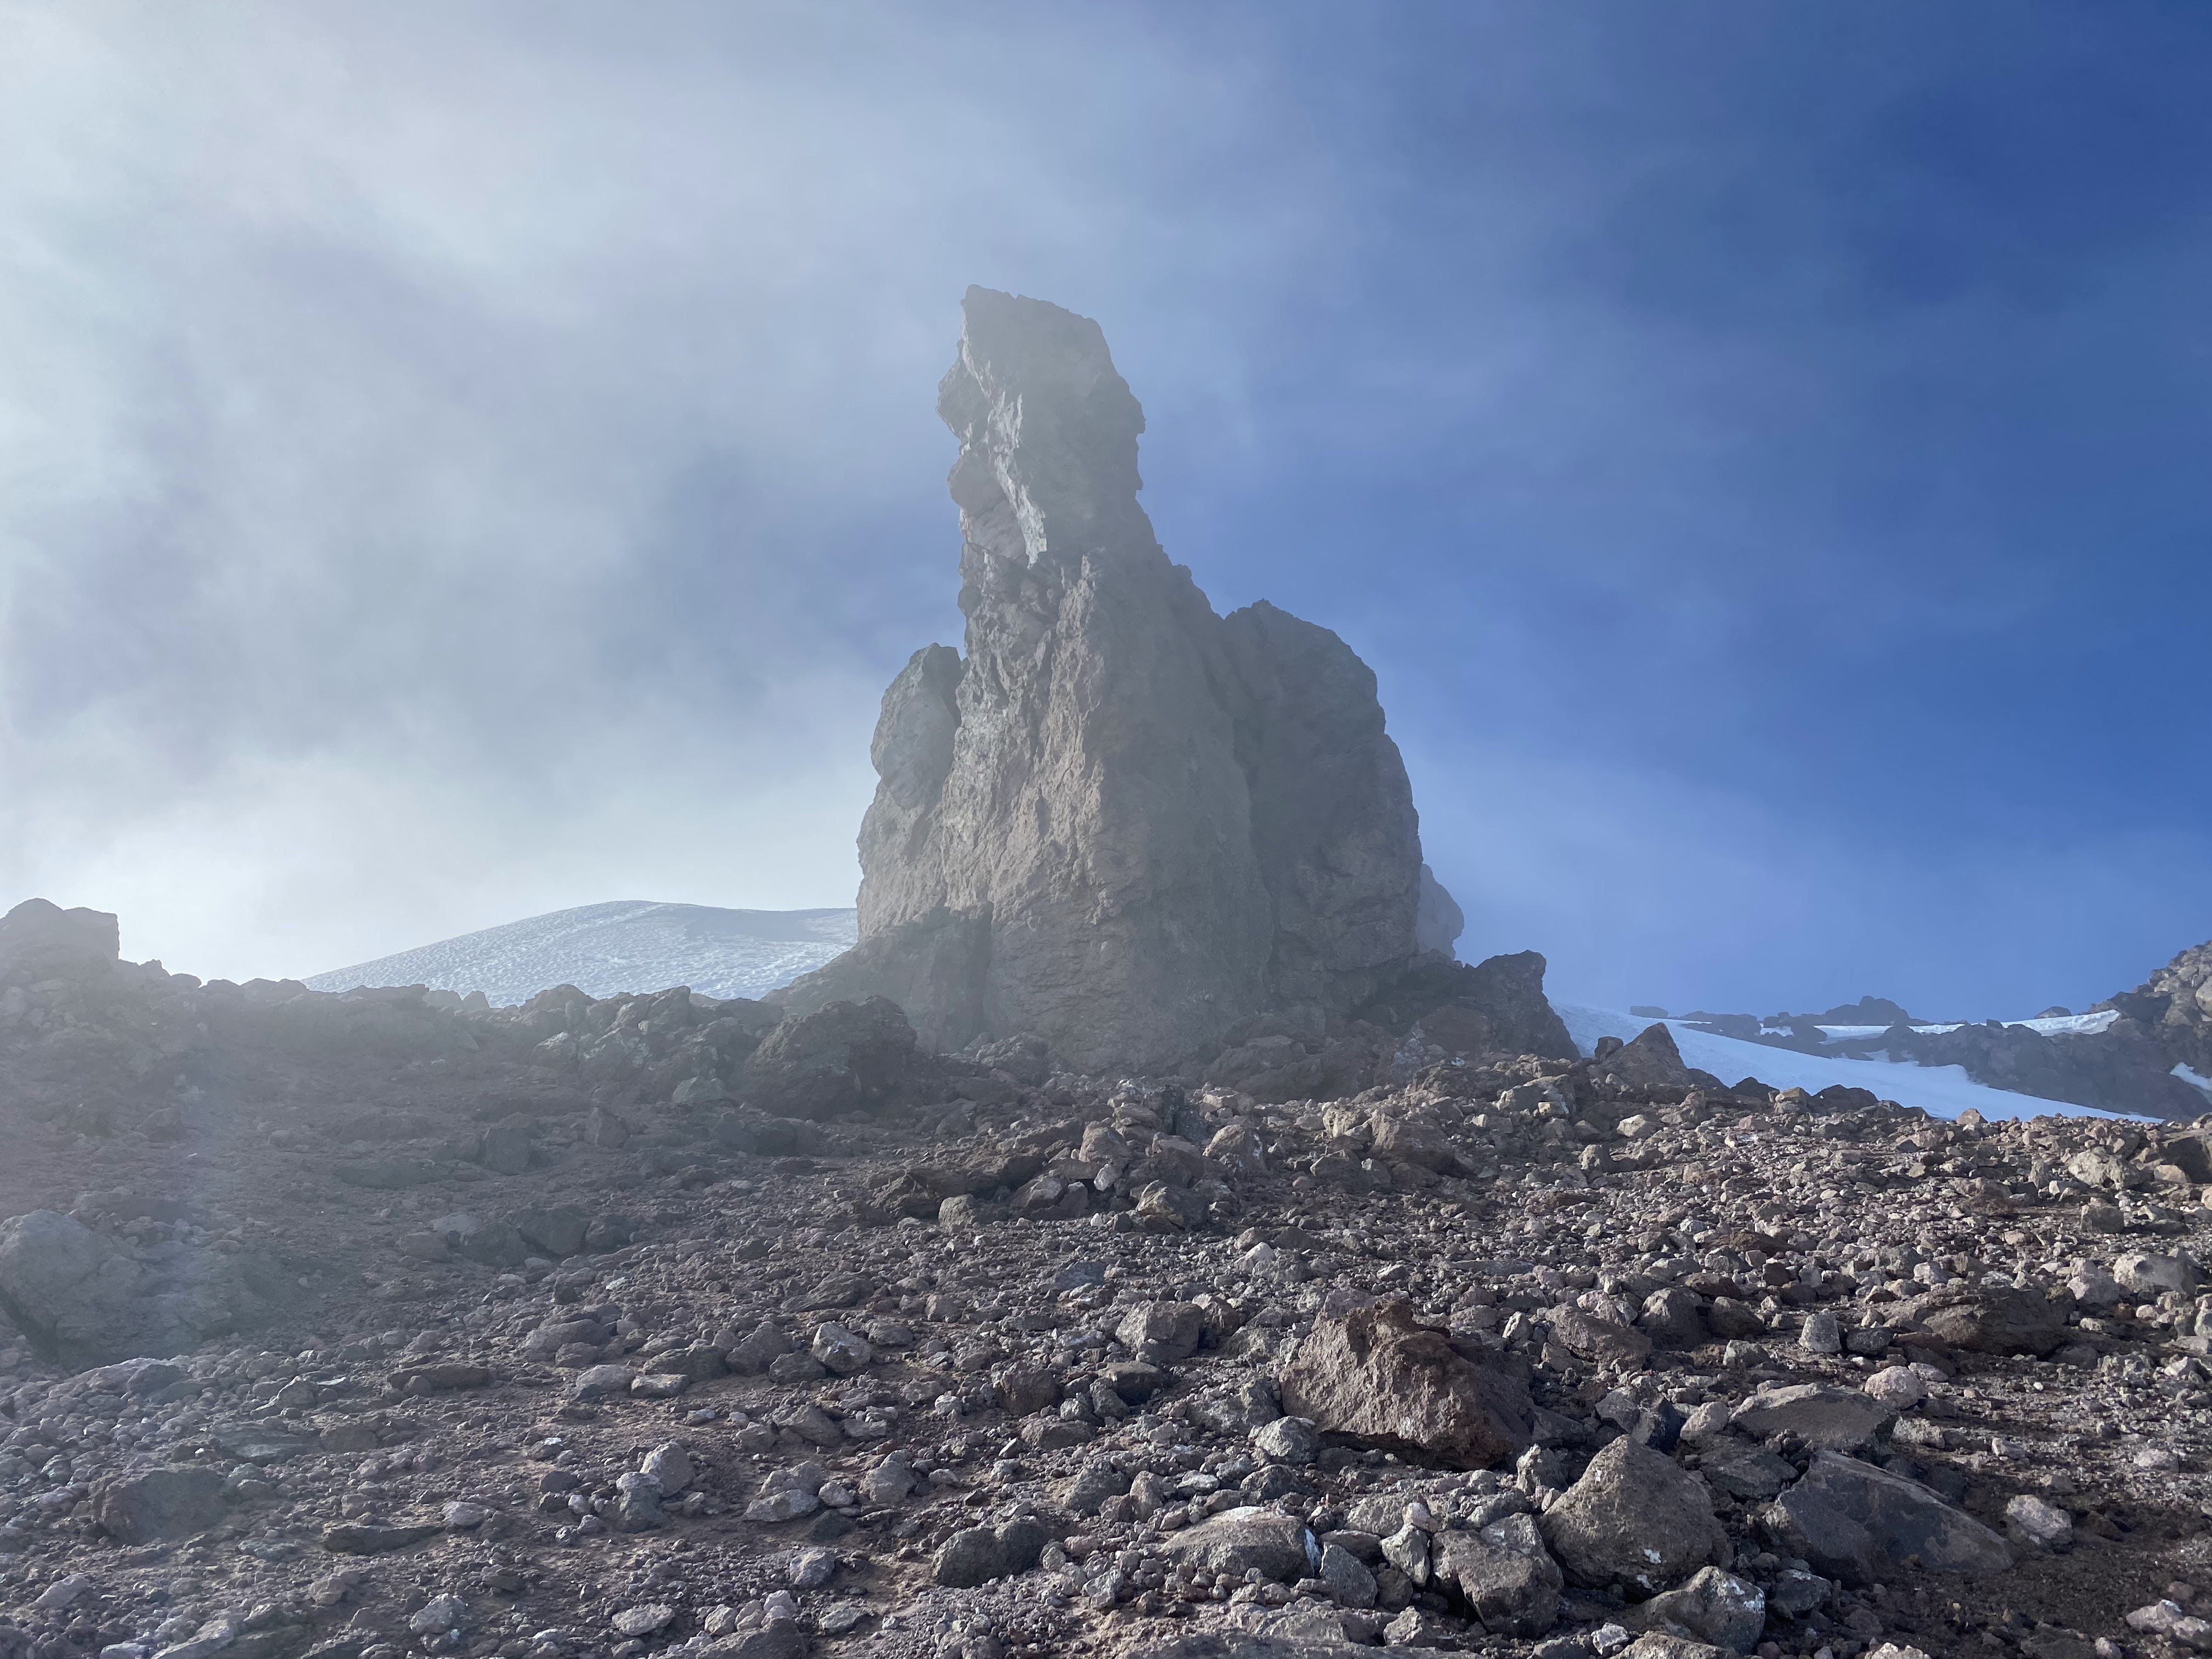
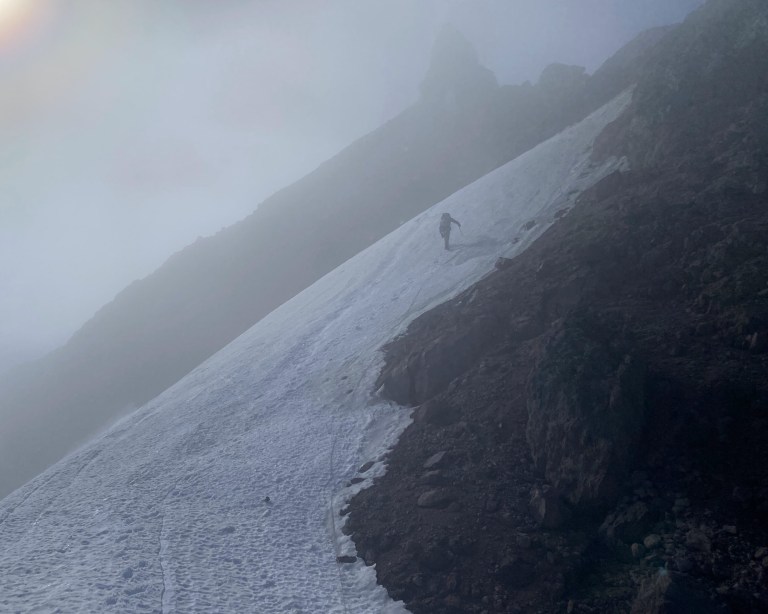
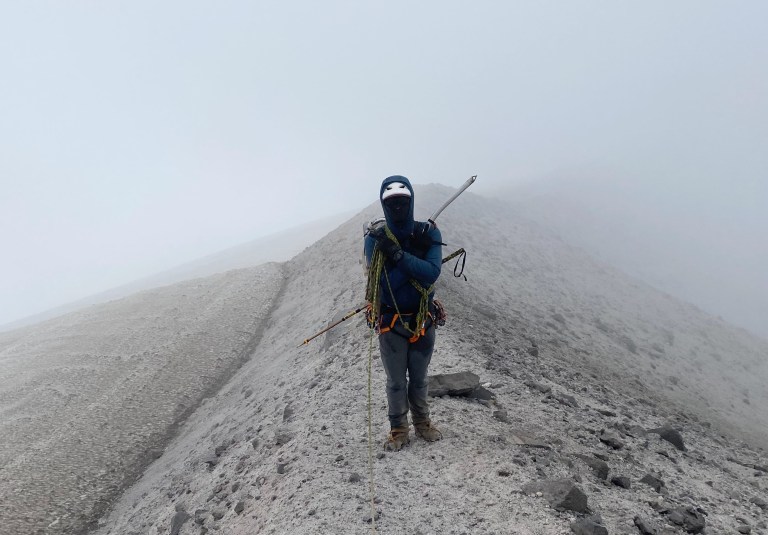
After packing up camp, we cramponed up a snow patch up to the rocky ridge crest. On the third class rock of the ridge crest we faced intense wind, which almost knocked me over several times. Dealing with the wind on the crest was still preferable to slogging up the endless granulated pumice on its flanks! An impressive tower – lovingly referred to as “the rabbit’s dick” in many trip reports – was reached and passed on the left via steep(!) snow. Here, we put on the rope so I could belay Larissa on the steepest snow sections. This was her first volcano climb and she was crushing it! I led us up a few steps of steep snow and 4th class rock to the Rabbit Ears, a pair of eroded lava pinnacles that form twin towers along the ridge. A tight notch allows passage between them. We unroped in the notch and scrambled down loose third class to the base of a corniced ridge. Clouds poured over the ridge, obstructing our view of anything beyond the ridge. Visibility was poor and getting worse. Nothing to do but charge into the wind.

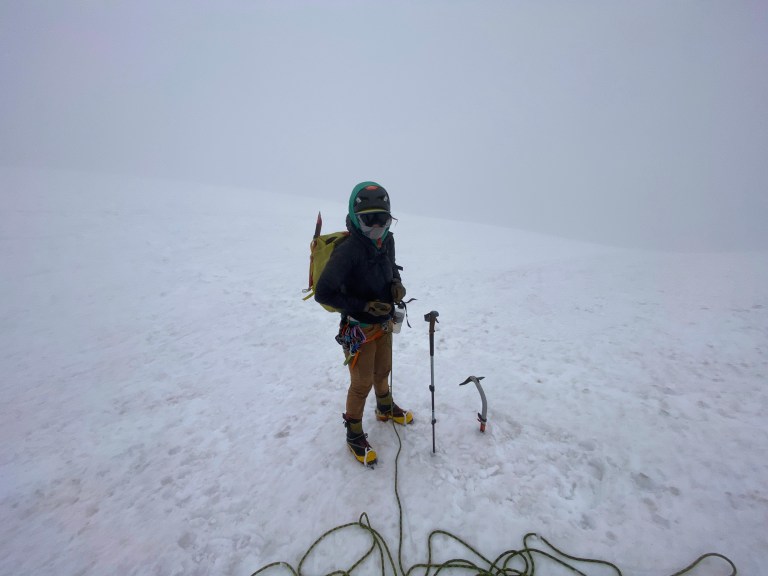
Once at the top of the corniced ridge, I couldn’t see a thing. I may as well have been standing inside a ping-pong ball! The wind had grown even more intense, and the undercast cloud layer that we experienced on the North side of the mountain was now being forced up and over the Southwest side of the peak by the prevailing wind. This created an intense whiteout in combination with 30-40 mile per hour sustained wind. Larissa had one more layer of clothing than me, but both of us were really starting to suffer in the cold. All of the clothing I carried – just soft shell pants, a sun hoody, a mid layer jacket and a windshell – was barely taking the edge off. I cursed myself for choosing to go “ultralight” with my layers before regaining focus on the task at hand. We needed to get to the summit fast so that we could make our escape down the easier side of the mountain.
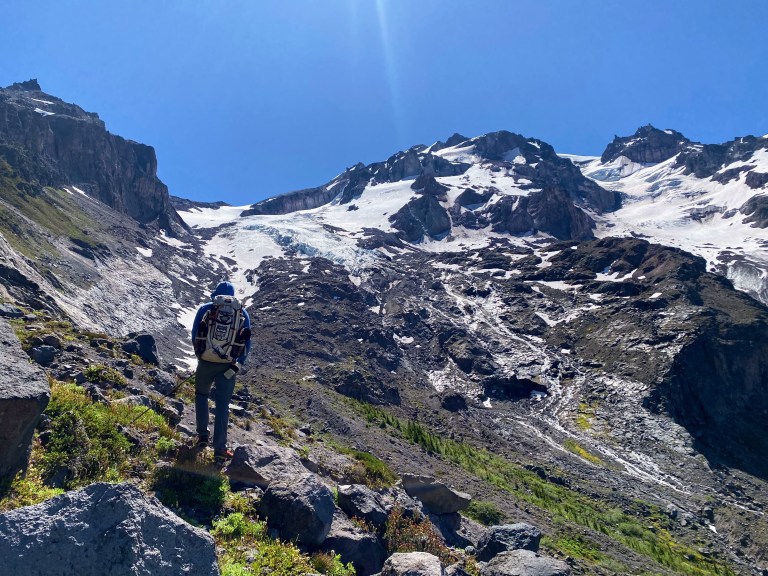
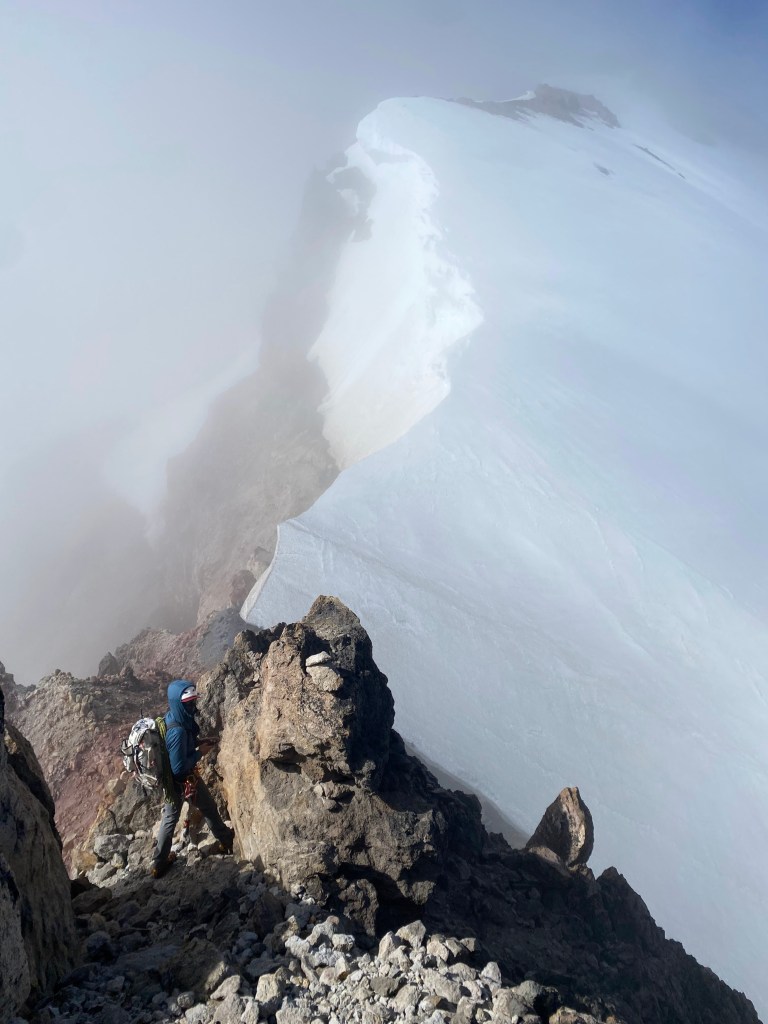
A momentary clearing of the air gave a glimpse of the summit dome. Our route would ascend two steps of exposed glacial ice, and they were much bigger than I had anticipated. At the the base of the first step, I considered our limited technical equipment: a 30 meter rope, three ice tools, one aluminum ice axe, three ice screws, a picket and a few slings. The ice above was neon blue glacier ice around 60 degrees in steepness. I couldn’t see well enough to know if we were on the line of least resistance but it didn’t matter to me – we were going up! I grabbed two of our ice tools and led upward until the rope came tight. Once my two-screw anchor was built, I clipped one ice tool to the rope and zipped it down to Larissa so she could also climb with two tools – the aluminum ice axe was useless on this kind of hard ice. I led the next pitch quickly, belaying off a T-slotted picket and repeating the ice axe transfer. Regrouped at my anchor, both of us were absolutely frozen. The wet ice had soaked both of us while we were climbing and the wind had only gotten worse. Visibility went down to 30 feet. We couldn’t catch a break up here.
I found myself at the base of the second step, again completely unable to find the line of least resistance. The blue ice wall simply extended upward and to both sides until it disappeared into the mist. Things were feeling a bit gnarly, but I knew that I could climb any part of this wall. I guess I’ll just go straight up! I clenched my fists to squeeze as much water as possible out of my gloves before firing up the first 30 meter pitch. On the second pitch, I finally spotted snow above that marked the end of the ice climbing. Yes! I made another move upward and felt the rope come tight – I was ten meters short. Larissa and I hadn’t discussed simulclimbing, but it was clearly our best option. I placed an ice screw and clipped it to the rope with a progress capture pulley before zipping an ice tool down the rope to Larissa. Once she started climbing, I climbed the rest of the ice with one tool and stepped onto the relatively flat crater rim of the peak. Larissa arrived shortly after with numb hands. We made it – now let’s get out of here! I led off into the maelstrom to locate our descent route.
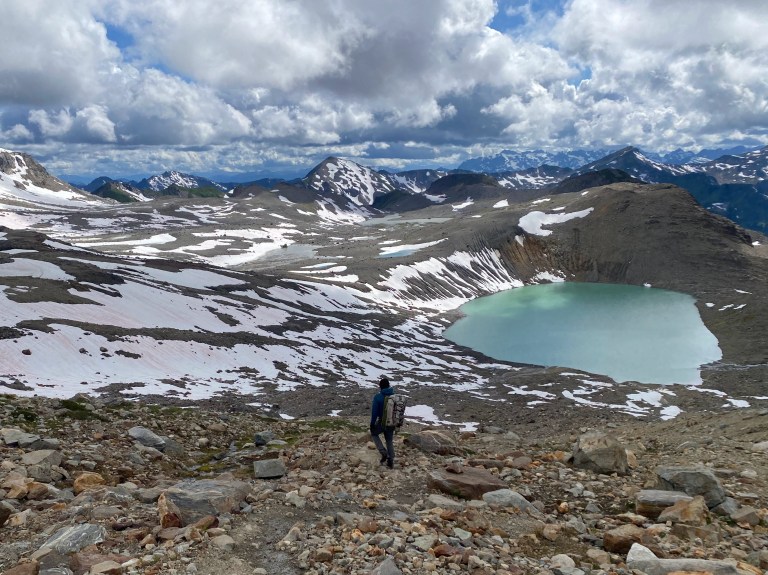
With a bit of poking around in the whiteout, I sniffed out the boot track leading onto the Cool Glacier. A quick skirt of the Suiattle Glacier brought us to Gerdine Ridge which guided us down and out of the clouds. It was a big relief to be able to see where we were going again. A long(!) slog through absolutely stunning, rugged terrain brought us to camp near White Pass for the night. All that was left was to finish the grind out to the car in the morning.

This was an unforgettable trip! Truly an amazing way to experience a mountain as majestic as Dakobed for the first time. Larissa got her first volcano summit in perhaps the most bad ass way possible: climbing a non-standard, technical route and traversing the mountain. I highly recommend Frostbite Ridge to any adventure climber in the Cascades looking for a route well off the beaten path.
Gear Notes
Back in the day, this route was a straightforward snow climb early season. Nowadays, it’s much more likely that you’ll run into alpine ice on the route regardless of how early in the season you make your attempt. This means that aluminum crampons and axes are a real gamble. I recommend steel crampons, 3/4 shank boots, and two ice tools/axes per person.
A 60m rope would have made the summit ice pitches MUCH easier – eliminating the need for semi-hanging ice screw belays. That said, experienced ice climbers will easily solo or simulcimb the ice pitches. If planning to solo or simul, a 30m rope and one ice screw per person should work just fine. If planning to belay the ice pitches, bring more screws. 1 picket for the team should be enough.
Breathable approach footwear is a necessity for the amount of hiking you’ll be facing. I used my La Sportiva TX3 approach shoes, but trail runners would make more sense.
Strategy Notes
If approaching via North Fork Sauk River, start from the car with 1L of water or less (I use a 800mL bottle). Fill up water at the Mackinaw Shelter – it’s the last good source for a long way. Once over Red Pass, water sources are plentiful. There’s no reason to carry more than 1L of water at any point on the approach.
Our 4-day itinerary was pretty sweet and allowed plenty of time to cover the big distances required. Our schedule could be optimized a bit as follows:
Day 1: North Fork Sauk Trailhead to a PCT campsite just a mile or so before Kennedy Creek. This evens out the level of effort between day 1 and 2, and allows a morning crossing of Kennedy Creek when the water level is low.
Day 2: Kennedy Creek to high camp at 8800 feet. There is some flowing water near this camp, but it is silty and filled with pebbles. Consider bringing some type of bag (contractor bag, heavy duty 1.5 gallon ziplock bag) to fill with snow. Put it on a hot rock in the sun and you’ll have water in an hour or two.
Day 3: Climb Frostbite Ridge to summit, descend as far as possible on the Gerdine Ridge/Cool Glacier route. With such a high camp the night before, you should be able to make it to White Pass if not Mackinaw Shelter. Fast teams could stagger all the way to the car.
Day 4: Finish the hike to the car.
There are many itineraries possible from 1-5 days all depending on your strategy and fitness. Have fun!
