
Poster Peak climbed via Blue’s Buttress (III 5.7) on 8/6/16 with Sean.
Sean and I rolled up to our dirtbag campsite at 11pm on Friday, which was a beautiful night. Clear nights in the mountains are best done sans rainfly to allow full appreciation of the incredible night sky – the milky way was plainly visible as I drifted off to sleep. I had been wanting to try a less-traveled route at Washington Pass and settled on Poster Peak via Blue’s Buttress. Researching the route, it stood out as an easy day out on a striking feature – the line just looks awesome! It would make for a perfect end to a week-long vacation at Lake Chelan. Life is good.
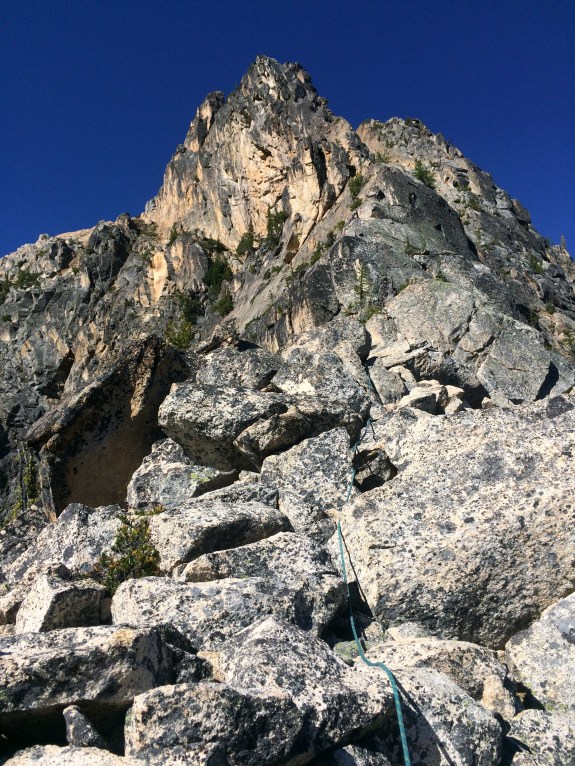
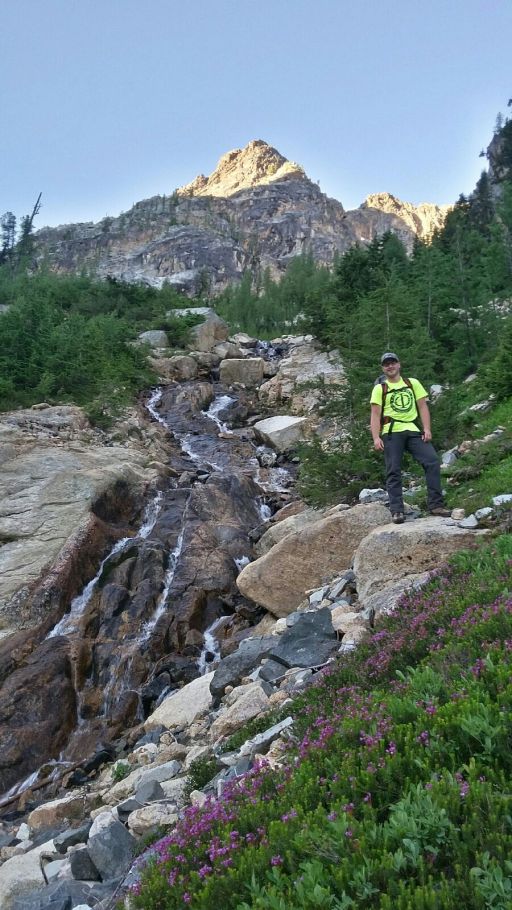
With the usual early start, we left the Hairpin at 5:30 am. Poster Peak is easy to see from the road, capping the ridgeline that extends Southeast from the Liberty Bell group. Approach beta: The hike in is fairly easy to follow, but cairns are not plentiful as they are knocked down by massive avalanches every winter. Head toward Kangaroo pass on a good trail from the Hairpin before splitting off to the right to head up a drainage directly toward the Northernmost buttress on Poster Peak. This feature is known as House’s Buttress (III 5.9), put up by the legendary Steve House as an onsight free solo! A few hundred feet below House’s Buttress, traverse left to Blue’s Buttress. You’ll need to come up on the left of the toe of the buttress to ascend easy ledges to the base of the route at a nice, flat ledge above a 30′ dead tree.
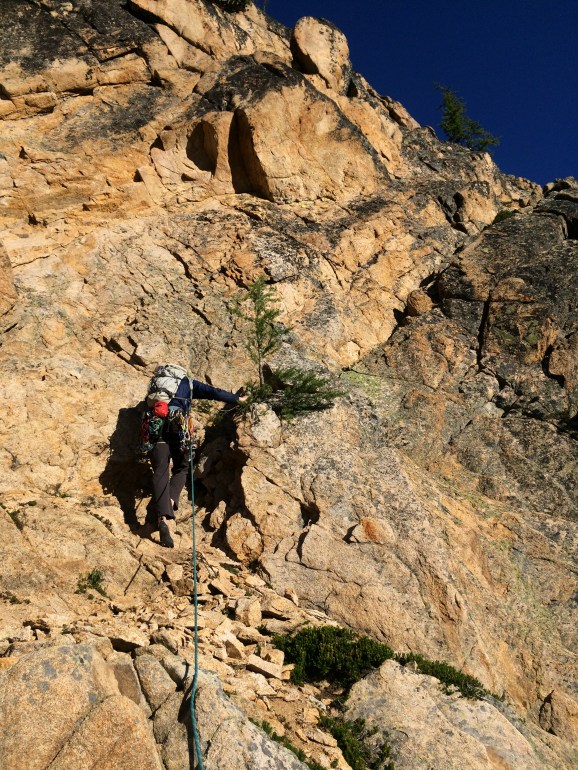
Sean began our the first pitch at 8am, but did not place any gear – it was mostly third class with only a little real climbing. Sean kept the lead for the second pitch, covering more easy ground. We swapped several long leads up the buttress, repeatedly stretching out the full length of our 70m rope. Sean led the crux pitch, which was 20 feet of awkward 5.6. There was a fixed forged friend on this pitch with an OK-looking sling, which Sean clipped. After this, a couple more leads brought us past a runout 5.6 face to the base of a 3rd class gully. I began leading this gully pitch, which required a delicate touch: it was very easy but also very loose. Killing your belayer by dislodging a loose block is generally accepted as bad style.
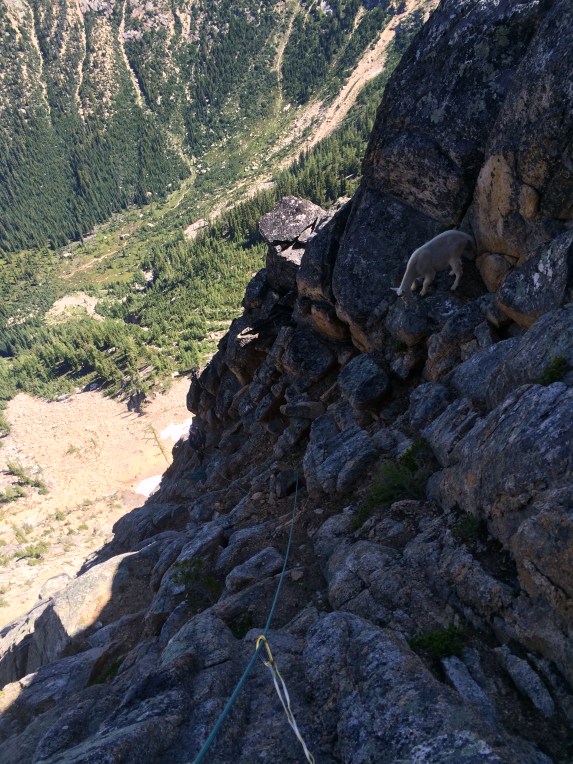
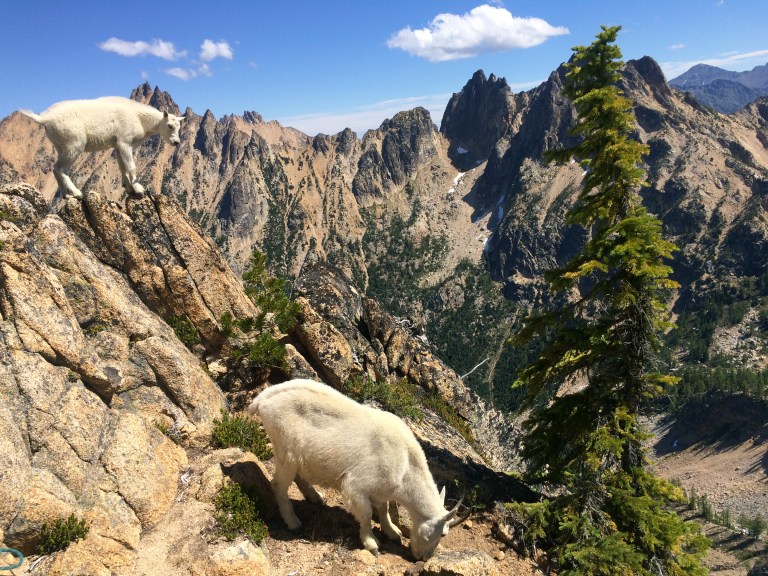
I was about halfway up the gully before I was hit by some falling pebbles dislodged by a large mountain goat bumbling around at the top of the gully. The goat stared for a moment with its freaky goat eyes before downclimbing towards me. I got a little nervous because I had not yet been able to place any protection – I quickly traversed and placed my smallest cam (blue Totem Basic) to protect from a massive goat-induced fall. The goat continued downclimbing past me toward Sean. Now I had to hurry to the top of the gully and put in a belay so that Sean could begin climbing and escape the goat. To be fair, all of my past mountain goat experiences have been peaceful, but I was not interested in getting shoved off the mountain! The goat climbed the gully again and joined me at my belay stance along with another young goat. They spent time eyeing me suspiciously from a few feet away while I belayed Sean.
From here Sean took the lead up our final pitch, which had the best climbing on the route. We reached the summit at 1PM. The descent was easy 3rd class, starting with a descending traverse to Poster Col before dropping down a steep scree gully back to the beginning of the route, which we reached at 2pm. From here, it was an easy hike back to the car before a drive home to Spokane. Total car to car time was roughly 10 hours.
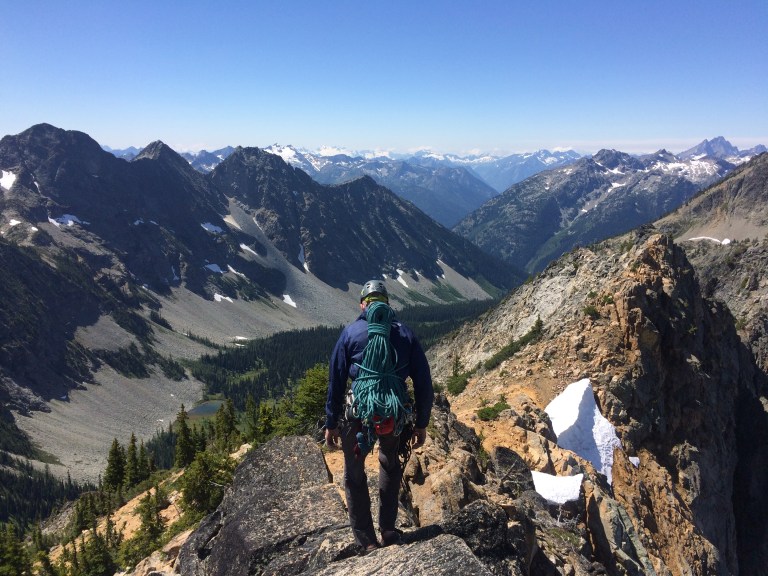
This route is just OK. It is very easy with only two short 5.6 cruxes breaking up a lot of easy climbing ranging from 3rd-easy 5th. I agree with the consensus that it is a great alternative to the South Arete of South Early Winters Spire (II 5.5). I found myself wishing for harder climbing on better rock, but this route was still a fun adventure. Sean and I estimate that we climbed 9 pitches with some simulclimbing thrown in.
Gear Notes:
We brought Totem Basic cams blue/green/yellow and a double rack of C4 cams .5-2 with a single #3. In addition, we had a set of nuts and large hexes. This rack was way bigger than we needed, but with the easy approach it was not a problem to bring it all. If I were to do the route again, I would bring a handful of medium nuts, large hexes, and a single rack of small cams to #3. Our 70m rope was nice for long pitches, but any length will do. Be ready to simulclimb, especially on the lower pitches.
