
During a pleasant evening of Monday night scrambling, I checked my phone, finding a text from Kyle: “Want to climb Yocum Ridge on Wednesday?” I laughed at Kyle’s nonchalant suggestion that we climb a route with such a serious reputation. I didn’t need any convincing, and after a quick consultation of the NOAA forecast we made a plan to attempt it on Thursday, March 12th, 2020.
I hadn’t climbed a mountain since August, choosing to shift my focus to sport climbing in the Fall. Winter was spent waterfall ice climbing and learning to ski. Spending less time training for high altitude and more time “pulling hard” had me feeling stronger than ever, but I needed to climb a proper mountain again. There’s something magical about putting together the effort, skill, judgement and suffering required to climb a technical mountain route alongside a good friend.

After a 3:00am start and grind to Illumination Saddle, we were getting battered by high winds as we rushed to don harnesses, crampons, and every piece of clothing that we carried. It’s important not to get demoralized in moments like this: you’re cold, getting colder, and it’s windy enough that you might not be able to climb at all. Sensation in my hands vanished as I tied in. Kyle led us down and across the Reid Glacier toward our objective.
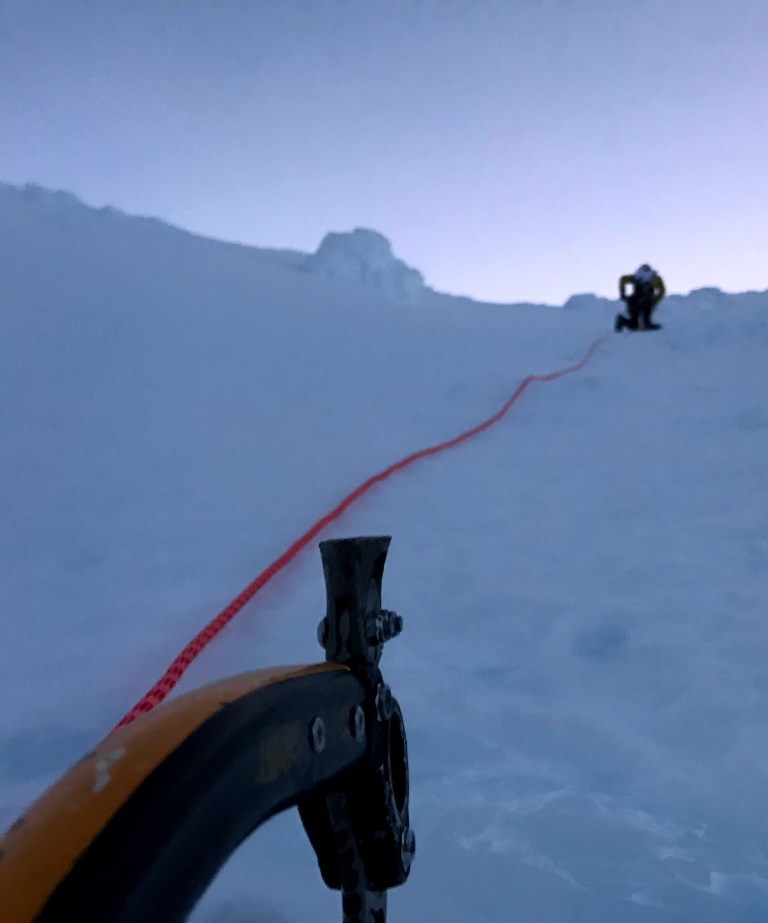
First light graced the sky as we climbed a ramp onto the ridge. Conditions were incredibly icy, a good sign considering we needed icy conditions to make the cruxes of the route possible. Simulclimbing ice to the foot of the first gendarme, Kyle placed decent ice screws along the way before finding a perfect ice cave for a sheltered belay. Kyle quested upward from this anchor, loaded for bear with a rack that included pins, nuts, cams, ice screws and pickets.
Kyle led a nice technical pitch that started with some steeper rime ice climbing off the belay before mellowing to 60 degree ice. Shivering, I followed quickly and suffered a bout of the screaming barfies at the belay. I took the lead for the next pitch, which started with a serious-looking rime ice boulder problem, the definite crux of the first gendarme.
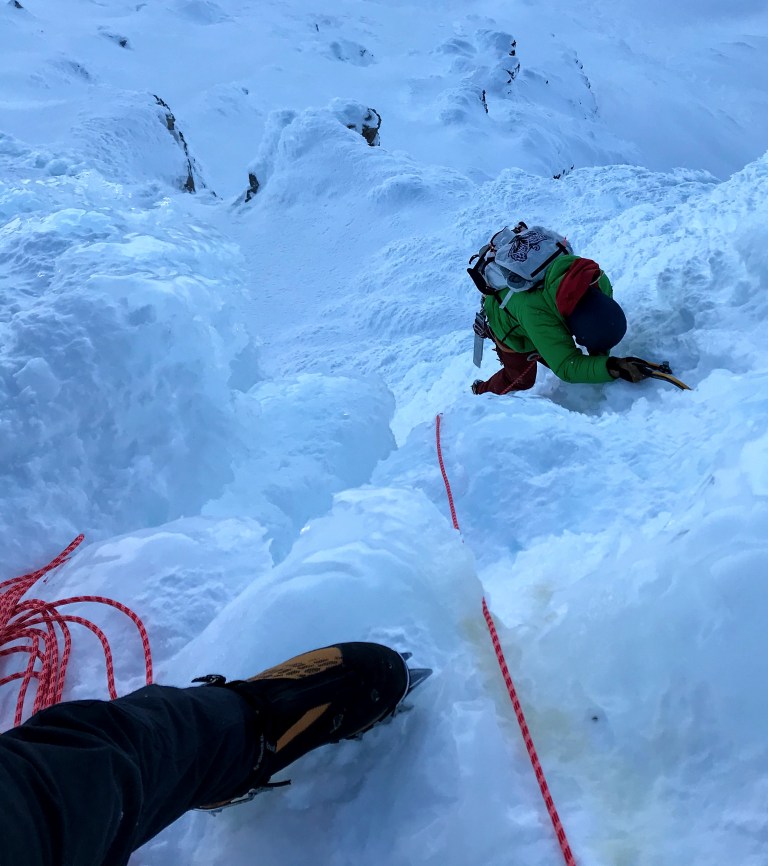

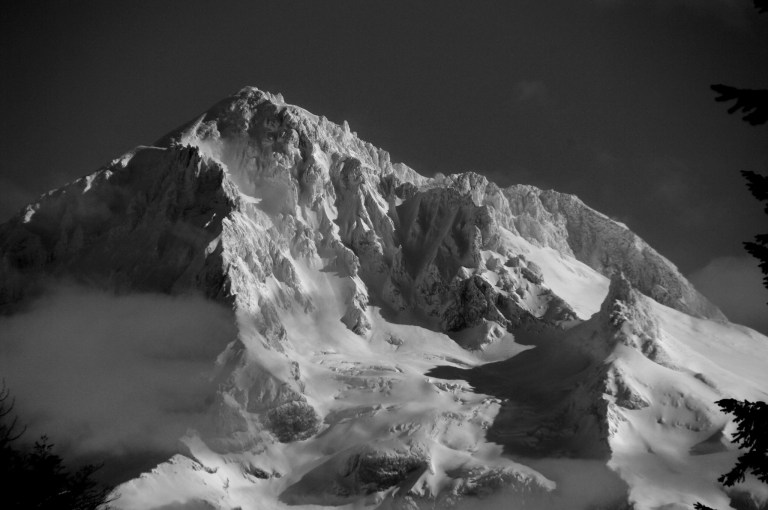
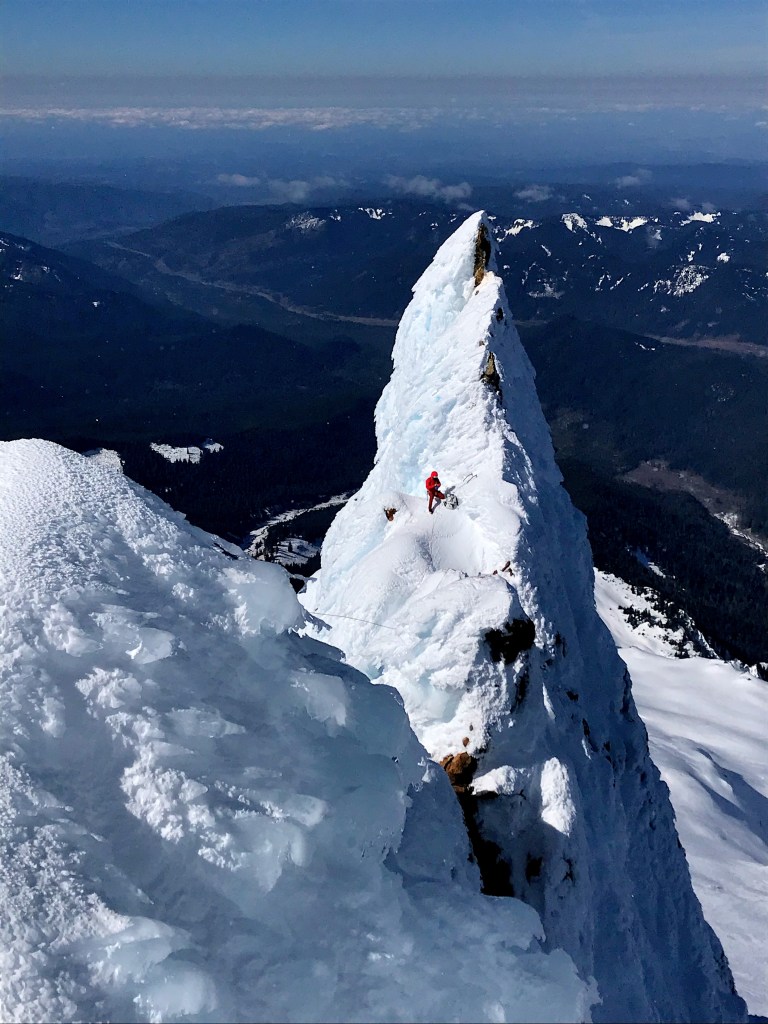
To understand Yocum Ridge, you have to understand rime ice. Rime forms when supercooled drops of water come in contact with a sub-freezing surface, instantly transforming the droplets into a mess of ice crystals and trapped air. The consistency is extremely variable, with layers of hard, blue ice between pillows of creamy ice that won’t support any weight. Rime ice is unstable, difficult or impossible to protect, and only dubiously attached to the mountain. Kyle explained, “It’s like ice climbing… only different!” Leading this steep step was a team effort, with Kyle offering beta as I hacked away at the ice. Cleaning away layers of rime in an attempt to find solid tool placements was exhausting. Kyle shouted encouragement over the wind: “Alright Nick! Looking good! Might want to get that right foot in better though!”
As Kyle reached my belay anchor at the top of the first gendarme, I admitted that I was dreading what we’d have to do next: rappel off of a rime bollard. In essence, this involves chopping a channel around a pinnacle of rime ice, wrapping your rope around it, and rappelling off. Kyle had joked about having a doctorate in rime ice climbing from his experience ascending technical routes on Illumination Rock, so he took charge building the bollard. “This looks good, there’s even a little bit of rock captured in the bollard!” I cringed as he committed to the fully vertical rappel to the South of the ridge, but was reassured when the anchor held solid. I pulled the picket backup and made the rappel to Kyle’s anchor on a steep ice slope.
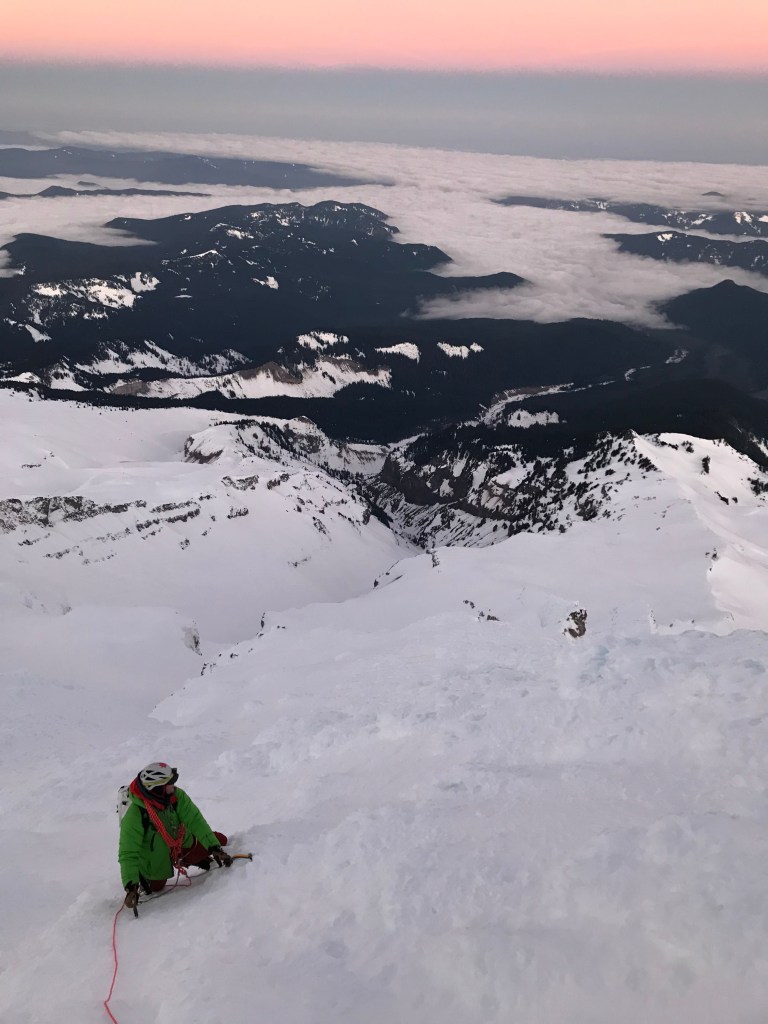
From here, I cruised up a few meters of comparatively mellow ice until I found myself staring at the steep rime that needed to be climbed to regain the ridge crest. I knew that I needed solid protection before attempting to climb the gnarled tentacles of white, weak ice, which of course started with another slight overhang. Every ice screw I tried to place at the base of this cruxy section was easily pulled out by hand. Finally, I smashed a picket into a hummock of snow and committed. With intense concentration I forged upwards, cleaning away hundreds of pounds of ice between marginal tool placements. Without any more options for protection beyond the singular picket, I finished the 50 meter pitch and brought Kyle to my sunny, wind-protected stance on the uphill side of the first gendarme. After such a harrowing lead, I was happy to let Kyle take charge on the next pitch, which looked as hard as anything we’d climbed yet.
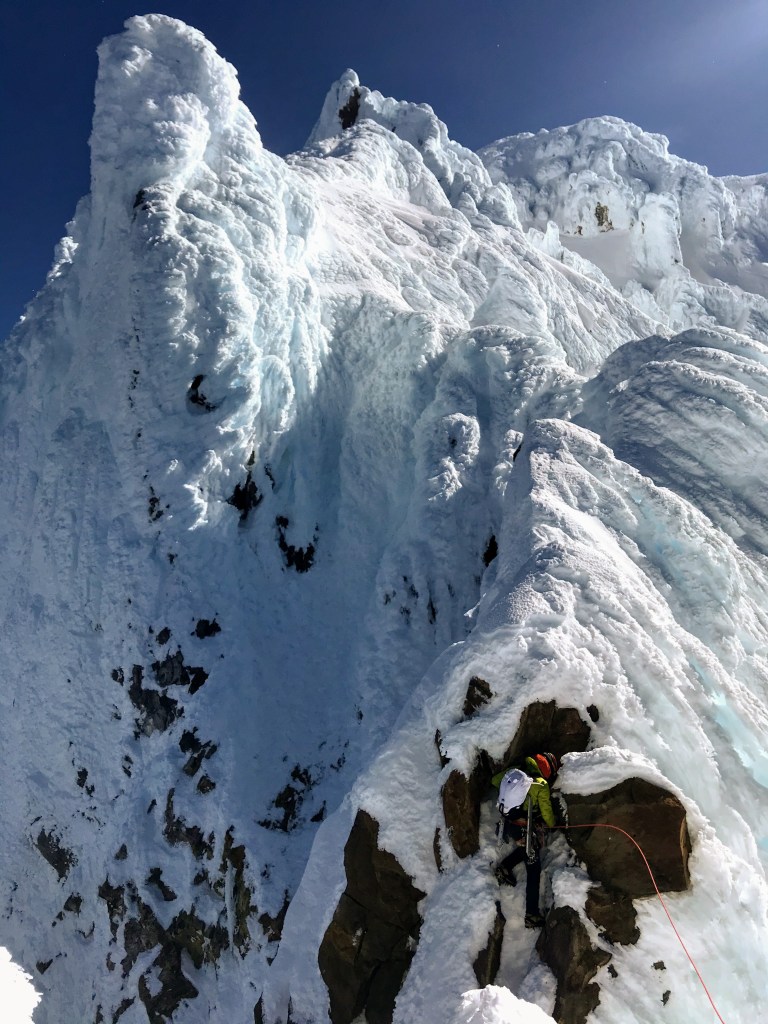
We took a much-needed 3 minute break to eat and drink before Kyle set off to lead the traverse. A delicate jump down was required to get into the first notch, followed by a rocky boulder problem to climb back out. After navigating this, Kyle worked his way through the rest of the pitch and used some creative sign language to communicate that I was on belay. I delicately followed, cleaning a knifeblade piton, a tiny nut, several ice screws and two pickets along the way to Kyle’s anchor, which consisted of his ice tool T-slotted in the icy slope. We were using every trick in the book!
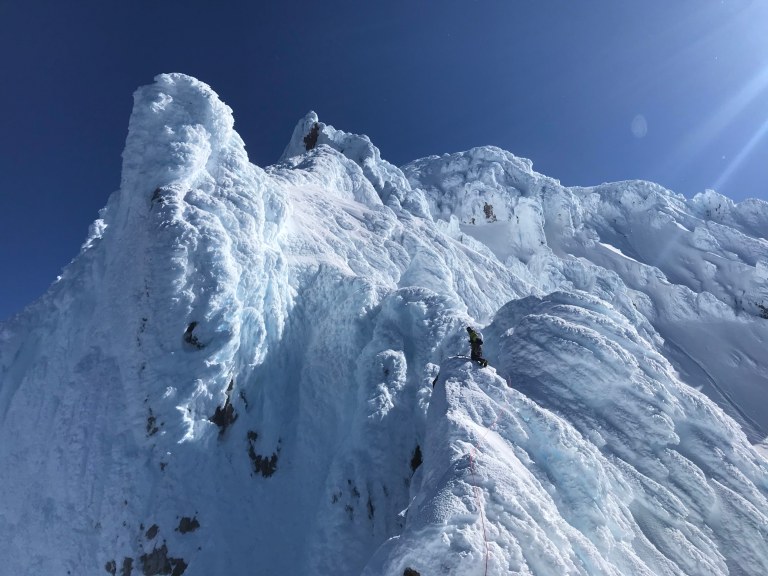

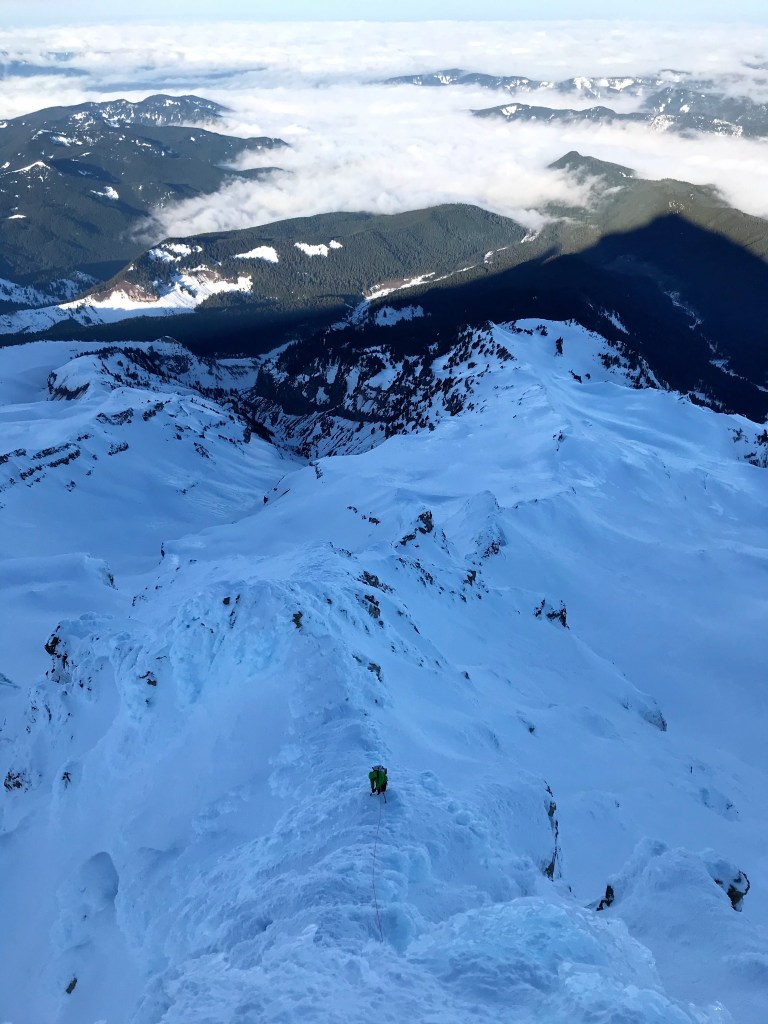
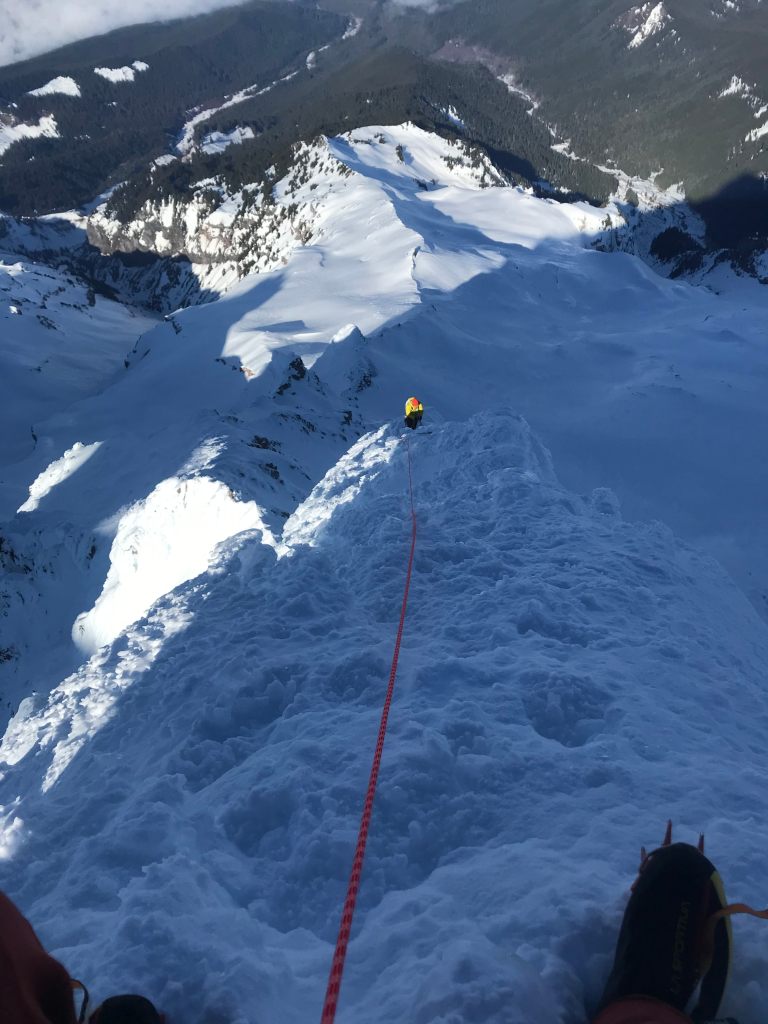
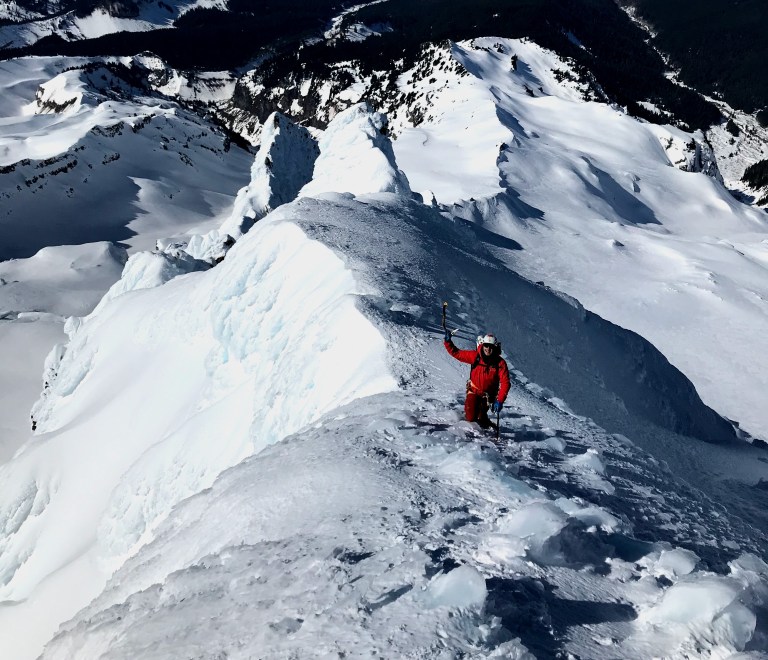
From here, things mellowed out slightly as the ridge broadened from a serrated steak knife to a blunt butter knife. We coiled the rope and began soloing on fun AI2-3 terrain, covering ground quickly for the first time on the route. We reached the top of the third gendarme and decided we needed to make another rappel. Feeling emboldened after our earlier rappelling success, I chopped the rime bollard, wrapped some cord around it, and rigged my Beal Escaper. The Escaper is a device that allows you to make full-length rappels with a single rope while still allowing you to recover the rope afterward. We made a 55 meter rappel to the North, occasionally free-hanging over vertical rime and rock, allowing us to gain a 60 degree ice field. We stowed the rope again, soloing the icefield and more rime ice to regain the crest of the ridge near the junction of the lower and upper ridge.
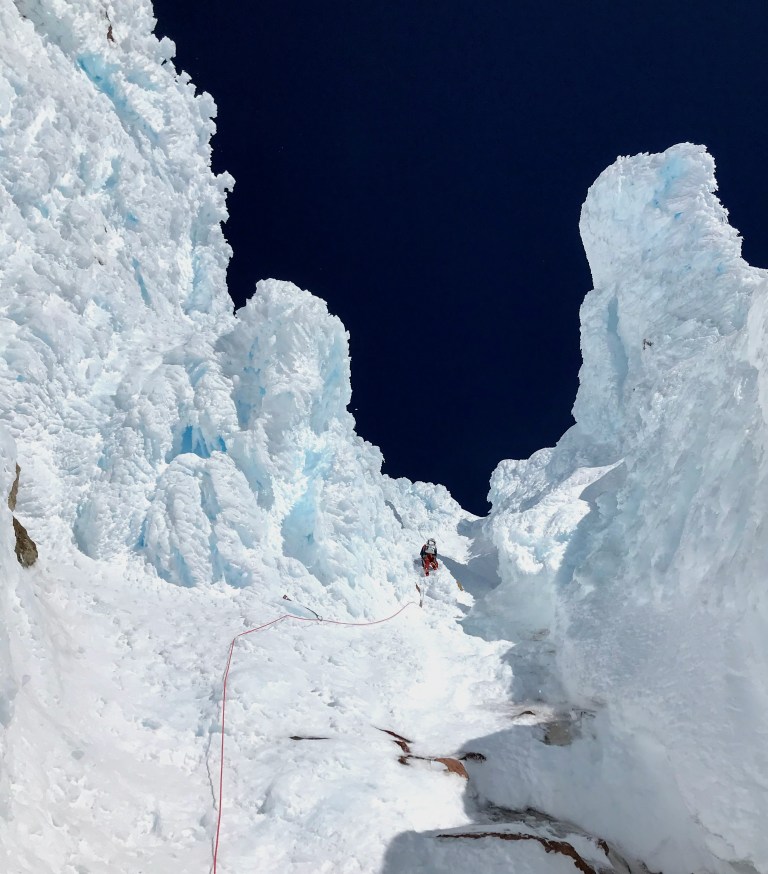
From here, we roped up again and took the 1959 Beckey/Scheiblehner variation involving tricky traversing, downclimbing, and climbing back up again until we could enter the final obvious gully. It was late in the day and the sun was roasting the rock towers above us, melting their shimmering coats of rime. Constant pelting by falling ice highlighted the need to move quickly. I charged into the gully, leading our last simulclimbing block on ice and neve, carefully avoiding the deep channel which was running with falling ice. Growling as I hacked away at the ice, I made it a point to catch the largest pieces of ice that I knocked loose. Pushing them into the snow, they were one less bullet for Kyle to dodge as he followed behind me.

Finally, we crested the top of the gully and traversed into the top of Leuthold Couloir. There was a final, easy gully that we could have taken to finish on the ridge proper, but with increasing icefall hazard it didn’t make sense to take the risk for another pitch of easy climbing. We continued to the Queen’s Chair, arriving at 4pm. After enduring more brutal wind, we topped out the summit ridge and descended Old Chute back to Timberline for a 15.5 hour day. Big thanks to Kyle for being such a solid partner for a challenging climb!
Strategy Notes
Ensure that you have a wide range of experience with schiesty alpine climbing techniques, including the ability to confidently solo stretches of vertical, poor quality ice.
Gear Notes
We brought and used three pickets, six screws, small nuts, pitons, and small cams. Bring a rope system that will allow you to make full-length (60m) rappels – you’ll need it if you have to bail high on the route.

Some the most spectacular scenery of all your climbs. Rime ice menagerie! Thanks for sharing.
LikeLiked by 1 person
The pictures of the crux sections made me skip a few beats. Fantastic feat. I felt the rime ice boulder problem and the vertical pitch that Kyle led were extremely dangerous. Glad you guys safely climbed this incredibly risky ridge line.
LikeLiked by 1 person
Listened to your Firn Line. It was awesome. Congrats on a spicy route! I enjoy following your updates.
LikeLiked by 1 person
Just plain scary!
LikeLike
Awesome job climbing it, TR, and photos. Survivor of a March 1985 ascent, Joe.
LikeLike
Thanks for the compliments and for stopping by, Joe!
LikeLike